20111 月13
文章标签 ‘Android’

201012 月2
Android 2.3让人兴奋的十大理由
Google Android开发团队的老大安迪鲁宾此前已经透露Android 2.3即将在12月6日发布,眼看日子越来越近了,大家对Andriod 2.3都抱着什么样的心情?来看看Android 2.3姜饼系统令人为之兴奋的十大理由:
1. 新加入的视频聊天功能
鉴于FaceTime让苹果有很多谈资,Google打算在2.3版系统中加入视频聊天功能予以回击。这意味着Google特意作出一款应用来与苹 果竞争,当然会不会用就看你自己的选择了。苹果或许认为他们已把视频聊天做的完美无缺了,但Google会不会带来新的惊喜,我们拭目以待。
2. 应用程序与系统更加融为一体
Android最大的缺点之一就是其应用看起来不像是系统的功能或是系统一部分,而更多的像是一些小扩展。Phandroid最近声称,Google将彻底对应用套件进行革新,使得其设计风格更加统一,类似于iOS的感觉。
3. 全面反击苹果
最近几个月,iOS 4.1和4.2抓住了智能手机领域的主动权。姜饼将在圣诞节前夕这一关键时期给Android一轮猛烈的宣传攻势,同时也希望与那些在智能手机大战中还没选定方向的大佬们达成共识。
4. 设计力求简洁
Android是高手,但是iOS在视觉和感觉方面确实要更好一些。无论如何,姜饼会有一个改进了的系统通知栏,同时用Android的绿色取代了 以前单调,容易让人觉得疲倦、难受的的瓦灰色。随着Palm以前的web OS UI(Palm webOS是一个嵌入式操作系统,以Linux内核为主体并加上部份Palm公司开发的专有软件)工程师来加入Google,我们可以期待更加华丽的体 验。
5. 自定义外观的终结
自从姜饼在今年夏天第一次被提起开始,已经有了大量关于深层社交网络一体化及时髦的UI设计的讨论。这意味着OEM厂商不再觉得有使用其自定义外观的必要。更重要的是,这意味着在未来等待更新系统的情况应该会大幅减少。
6. Android平板电脑长什么样儿
Google曾多次指出Froyo(Android 2.2系统代号)并不是为平板电脑而开发,同时暗示姜饼是。虽然平板电脑操作系统的新版本要等到1月份,但新版本的发布应该会给我们清晰地指出真正的Android平板与ipad的竞争格局会是什么样子。
7. 引发竞争对手提升游戏
永远不要低估一个新的操作系统可能带给对手的恐慌以及最终促使他们提供更新更好服务的能力。姜饼必将会影响苹果对于iOS4.X及后续系统的计划,而诺基亚无疑也会考虑如何在来年的MeeGo系统中包含类似的功能。
8. 速度才是关键
据传,只有运行512M内存和1G处理器的手机才会受邀参加姜饼的聚会。虽然这引起了不少的质疑,但同时也意味着使用姜饼系统的手机将都是最高端的手机。
9. 丰富多样的新机
尽管目前为止只有HTC Desire HD及Desire Z采用姜饼系统,而Galaxy S也仅仅配备了Android 2.2。但相信会有更多新手机会采用最新的姜饼系统。关于三星制造的Nexus 2最先采用姜饼系统的消息随处可见。随着圣诞节的来临,希望会有更多的进展。
10. 当前的Android手机将获得更多功能
如果你的手机符合姜饼的系统要求,那么姜饼会让你重新爱上你手里那款“年迈”的Android手机。不过你也不要指望三星、HTC、索爱等厂商最近几个月内能拿出什么好东西。
摘自:http://www.74phone.com/?p=495
201011 月18
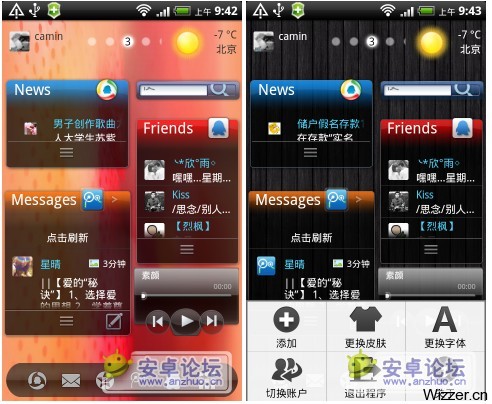
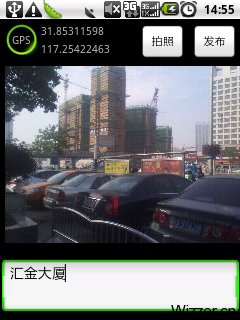
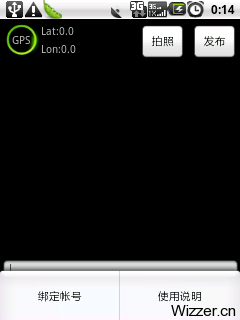
MyCity 我的城市街拍,新浪微博街拍Android客户端 1.0发布
MyCity —我的城市街拍 1.0
是Android上的一个新浪微博的客户端,目的是实现手机上街拍发布图片和地理位置信息到微博的功能。 现阶段主要实现以下功能:
- 通过MyCity拍照,可以把图片发布到微博 2. 通过MyCity获得GPS地理位置,分享到微博(通过google地图展示)
- 用户可以附加100字以内的说明文字
下载地址: /MyCity.apk
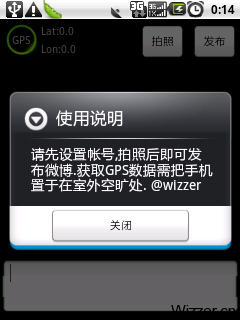
使用说明: 按MENU键或第一次按发布键绑定微博帐号,进行拍照后附加文字发布微博,若在室外空旷处运行获得GPS地理位置信息后程序会自动在微博内容中添加google地图链接。
更新日志: 1、2010-11-18 9:00 修改位置信息未添加到微博中的bug,囧,我的错。
应用效果


201011 月17
新浪微博Android 客户端通过HTTP POST发布图片和文字源代码(作废)
1、发送图片+文字
要特别注意,图片的文件名要为 pic 才会被新浪接收。
              Map map = new HashMap();
       map.put("source", "appkey");//改成自己的key
       map.put("status", txt);
       postImg("http://api.t.sina.com.cn/statuses/upload.json",map,Environment.getExternalStorageDirectory()+ "/temp.jpg"
                                ,"帐号名字","密码");
              /**
     * 直接通过HTTP协议提交数据到服务器,实现表单提交功能
     * @param actionUrl 上传路径
     * @param params 请求参数 key为参数名,value为参数值
     * @param filename 上传文件
     * @param username 用户名
     * @param password 密码
     */
    private void postImg(String actionUrl,Map params, String  filename,String username,String password) {
        try {
            String BOUNDARY = "--------------et567z"; //数据分隔线
            String MULTIPART_FORM_DATA = "Multipart/form-data";

            URL url = new URL(actionUrl);
            HttpURLConnection conn = (HttpURLConnection) url.openConnection();

            conn.setDoInput(true);//允许输入
            conn.setDoOutput(true);//允许输出
            conn.setUseCaches(false);//不使用Cache
            conn.setRequestMethod("POST");
            conn.setRequestProperty("Connection", "Keep-Alive");
            conn.setRequestProperty("Charset", "UTF-8");
            conn.setRequestProperty("Content-Type", MULTIPART_FORM_DATA + ";boundary=" + BOUNDARY);
            String usernamePassword=username+":"+password;
            conn.setRequestProperty("Authorization","Basic "+new String(SecBase64.encode(usernamePassword.getBytes())));

            StringBuilder sb = new StringBuilder();

            //上传的表单参数部分,格式请参考文章
            for (Map.Entry entry : params.entrySet()) {//构建表单字段内容
                sb.append("--");
                sb.append(BOUNDARY);
                sb.append("\r\n");
                sb.append("Content-Disposition: form-data; name=\""+ entry.getKey() + "\"\r\n\r\n");
                sb.append(entry.getValue());
                sb.append("\r\n");
            }
            //            System.out.println(sb.toString());
            DataOutputStream outStream = new DataOutputStream(conn.getOutputStream());
            outStream.write(sb.toString().getBytes());//发送表单字段数据
            byte[] content = readFileImage(filename);
            //上传的文件部分,格式请参考文章
            //System.out.println("content:"+content.toString());
            StringBuilder split = new StringBuilder();
            split.append("--");
            split.append(BOUNDARY);
            split.append("\r\n");
            split.append("Content-Disposition: form-data;name=\"pic\";filename=\"temp.jpg\"\r\n");
            split.append("Content-Type: image/jpg\r\n\r\n");
            System.out.println(split.toString());
            outStream.write(split.toString().getBytes());
            outStream.write(content, 0, content.length);
            outStream.write("\r\n".getBytes());

            byte[] end_data = ("--" + BOUNDARY + "--\r\n").getBytes();//数据结束标志
            outStream.write(end_data);
            outStream.flush();
            int cah = conn.getResponseCode();
            //            if (cah != 200) throw new RuntimeException("请求url失败:"+cah);
            if(cah == 200)//如果发布成功则提示成功
            {
                /*读返回数据*/
                //String strResult = EntityUtils.toString(httpResponse.getEntity());

                new AlertDialog.Builder(Main.this)
                // Main.this视情况而定,这个一般是指当前显示的Activity对应的XML视窗。
                .setTitle("")// 设置对话框的标题
                .setPositiveButton("确定",// 设置对话框的确认按钮
                        new DialogInterface.OnClickListener() {// 设置确认按钮的事件
                    public void onClick(DialogInterface dialog, int which) {

                    }})
                    .setMessage(" 发布成功 ")// 设置对话框的内容
                    .show();
            }
            else if(cah == 400)
            {
                new AlertDialog.Builder(Main.this)
                // Main.this视情况而定,这个一般是指当前显示的Activity对应的XML视窗。
                .setTitle("")// 设置对话框的标题
                .setPositiveButton("确定",// 设置对话框的确认按钮
                        new DialogInterface.OnClickListener() {// 设置确认按钮的事件
                    public void onClick(DialogInterface dialog, int which) {

                    }})
                    .setMessage(" 发布失败  \n 不可连续发布相同内容 ")// 设置对话框的内容
                    .show();
            }else{
                throw new RuntimeException("请求url失败:"+cah);
            }

            //            InputStream is = conn.getInputStream();
            //            int ch;
            //            StringBuilder b = new StringBuilder();
            //            while( (ch = is.read()) != -1 ){
            //                b.append((char)ch);
            //            }
            outStream.close();
            conn.disconnect();
        }
        catch (IOException e)
        {
            e.printStackTrace();

        }
        catch (Exception e)
        {
            e.printStackTrace();

        }

    }

             public static byte[] readFileImage(String filename) throws IOException {
        BufferedInputStream bufferedInputStream = new BufferedInputStream(
                new FileInputStream(filename));
        int len = bufferedInputStream.available();
        byte[] bytes = new byte[len];
        int r = bufferedInputStream.read(bytes);
        if (len != r) {
            bytes = null;
            throw new IOException("读取文件不正确");
        }
        bufferedInputStream.close();
        return bytes;
    }
2、只发文字
  //POST发布文本信息
        public  void sendMsg(String status,String username,String password){
            HttpClient httpclient = new DefaultHttpClient();
            HttpPost httppost = new HttpPost("http://api.t.sina.com.cn/statuses/update.json");
                //NameValuePair实现请求参数的封装

                List  params = new ArrayList ();
                params.add(new BasicNameValuePair("source", "4016954419"));
                params.add(new BasicNameValuePair("status", status));
                try
                {

                  //添加请求参数到请求对象

                    httppost.setEntity(new UrlEncodedFormEntity(params, HTTP.UTF_8));
                    httppost.getParams().setBooleanParameter(CoreProtocolPNames.USE_EXPECT_CONTINUE, false);

                    String data=username+":"+password;
                    httppost.addHeader("Authorization","Basic "+new String(SecBase64.encode(data.getBytes())));
                    httppost.addHeader("Content-Type", "application/x-www-form-urlencoded");

                  //发送请求并等待响应
                  HttpResponse httpResponse = new DefaultHttpClient().execute(httppost);
                  //若状态码为200 ok
                  if(httpResponse.getStatusLine().getStatusCode() == 200)
                  {
                    //读返回数据
                    //String strResult = EntityUtils.toString(httpResponse.getEntity());

                    new AlertDialog.Builder(Main.this)
                    // Main.this视情况而定,这个一般是指当前显示的Activity对应的XML视窗。
                    .setTitle("")// 设置对话框的标题
                    .setPositiveButton("确定",// 设置对话框的确认按钮
                    new DialogInterface.OnClickListener() {// 设置确认按钮的事件
                        public void onClick(DialogInterface dialog, int which) {

                    }})
                    .setMessage(" 发布成功 ")// 设置对话框的内容
                    .show();
                  }
                  else if(httpResponse.getStatusLine().getStatusCode() == 400)
                  {
                      new AlertDialog.Builder(Main.this)
                        // Main.this视情况而定,这个一般是指当前显示的Activity对应的XML视窗。
                        .setTitle("")// 设置对话框的标题
                        .setPositiveButton("确定",// 设置对话框的确认按钮
                    new DialogInterface.OnClickListener() {// 设置确认按钮的事件
                        public void onClick(DialogInterface dialog, int which) {

                    }})
                        .setMessage(" 发布失败  \n 不可连续发布相同内容 ")// 设置对话框的内容
                        .show();
                  }

                }
                catch (ClientProtocolException e)
                {
                  e.printStackTrace();
                  et.setText(et.getText()+" Error1:"+e.getMessage());
                }
                catch (IOException e)
                {
                  e.printStackTrace();
                  et.setText(et.getText()+" Error2:"+e.getMessage());
                }
                catch (Exception e)
                {
                  e.printStackTrace();
                  et.setText(et.getText()+" Error3:"+e.getMessage());
                }

         }
3、加密类 SecBase64.java
package wizzer.cn.app;

public class SecBase64 {
private static final byte[] encodingTable = { (byte) 'A', (byte) 'B',
    (byte) 'C', (byte) 'D', (byte) 'E', (byte) 'F', (byte) 'G',
    (byte) 'H', (byte) 'I', (byte) 'J', (byte) 'K', (byte) 'L',
    (byte) 'M', (byte) 'N', (byte) 'O', (byte) 'P', (byte) 'Q',
    (byte) 'R', (byte) 'S', (byte) 'T', (byte) 'U', (byte) 'V',
    (byte) 'W', (byte) 'X', (byte) 'Y', (byte) 'Z', (byte) 'a',
    (byte) 'b', (byte) 'c', (byte) 'd', (byte) 'e', (byte) 'f',
    (byte) 'g', (byte) 'h', (byte) 'i', (byte) 'j', (byte) 'k',
    (byte) 'l', (byte) 'm', (byte) 'n', (byte) 'o', (byte) 'p',
    (byte) 'q', (byte) 'r', (byte) 's', (byte) 't', (byte) 'u',
    (byte) 'v', (byte) 'w', (byte) 'x', (byte) 'y', (byte) 'z',
    (byte) '0', (byte) '1', (byte) '2', (byte) '3', (byte) '4',
    (byte) '5', (byte) '6', (byte) '7', (byte) '8', (byte) '9',
    (byte) '+', (byte) '/' };
private static final byte[] decodingTable;
static {
   decodingTable = new byte[128];
   for (int i = 0; i < 128; i++) {
    decodingTable[i] = (byte) -1;
   }
   for (int i = 'A'; i <= 'Z'; i++) {
    decodingTable[i] = (byte) (i - 'A');
   }
   for (int i = 'a'; i <= 'z'; i++) {
    decodingTable[i] = (byte) (i - 'a' + 26);
   }
   for (int i = '0'; i <= '9'; i++) {
    decodingTable[i] = (byte) (i - '0' + 52);
   }
   decodingTable['+'] = 62;
   decodingTable['/'] = 63;
}

//加密

public static byte[] encode(byte[] data) {
   byte[] bytes;
   int modulus = data.length % 3;
   if (modulus == 0) {
    bytes = new byte[(4 * data.length) / 3];
   } else {
    bytes = new byte[4 * ((data.length / 3) + 1)];
   }
   int dataLength = (data.length - modulus);
   int a1;
   int a2;
   int a3;
   for (int i = 0, j = 0; i >> 2) & 0x3f];
    bytes[j + 1] = encodingTable[((a1 <>> 4)) & 0x3f];
    bytes[j + 2] = encodingTable[((a2 <>> 6)) & 0x3f];
    bytes[j + 3] = encodingTable[a3 & 0x3f];
   }
   int b1;
   int b2;
   int b3;
   int d1;
   int d2;
   switch (modulus) {
   case 0:
    break;
   case 1:
    d1 = data[data.length - 1] & 0xff;
    b1 = (d1 >>> 2) & 0x3f;
    b2 = (d1 <>> 2) & 0x3f;
    b2 = ((d1 <>> 4)) & 0x3f;
    b3 = (d2 << 2) & 0x3f;
    bytes[bytes.length - 4] = encodingTable[b1];
    bytes[bytes.length - 3] = encodingTable[b2];
    bytes[bytes.length - 2] = encodingTable[b3];
    bytes[bytes.length - 1] = (byte) '=';
    break;
   }
   return bytes;
}

//解密

public static byte[] decode(byte[] data) {
   byte[] bytes;
   byte b1;
   byte b2;
   byte b3;
   byte b4;
   data = discardNonBase64Bytes(data);
   if (data[data.length - 2] == '=') {
    bytes = new byte[(((data.length / 4) - 1) * 3) + 1];
   } else if (data[data.length - 1] == '=') {
    bytes = new byte[(((data.length / 4) - 1) * 3) + 2];
   } else {
    bytes = new byte[((data.length / 4) * 3)];
   }
   for (int i = 0, j = 0; i < (data.length - 4); i += 4, j += 3) {
    b1 = decodingTable[data[i]];
    b2 = decodingTable[data[i + 1]];
    b3 = decodingTable[data[i + 2]];
    b4 = decodingTable[data[i + 3]];
    bytes[j] = (byte) ((b1 <> 4));
    bytes[j + 1] = (byte) ((b2 <> 2));
    bytes[j + 2] = (byte) ((b3 << 6) | b4);
   }
   if (data[data.length - 2] == '=') {
    b1 = decodingTable[data[data.length - 4]];
    b2 = decodingTable[data[data.length - 3]];
    bytes[bytes.length - 1] = (byte) ((b1 <> 4));
   } else if (data[data.length - 1] == '=') {
    b1 = decodingTable[data[data.length - 4]];
    b2 = decodingTable[data[data.length - 3]];
    b3 = decodingTable[data[data.length - 2]];
    bytes[bytes.length - 2] = (byte) ((b1 <> 4));
    bytes[bytes.length - 1] = (byte) ((b2 <> 2));
   } else {
    b1 = decodingTable[data[data.length - 4]];
    b2 = decodingTable[data[data.length - 3]];
    b3 = decodingTable[data[data.length - 2]];
    b4 = decodingTable[data[data.length - 1]];
    bytes[bytes.length - 3] = (byte) ((b1 <> 4));
    bytes[bytes.length - 2] = (byte) ((b2 <> 2));
    bytes[bytes.length - 1] = (byte) ((b3 << 6) | b4);
   }
   return bytes;
}

//解密

public static byte[] decode(String data) {
   byte[] bytes;
   byte b1;
   byte b2;
   byte b3;
   byte b4;
   data = discardNonBase64Chars(data);
   if (data.charAt(data.length() - 2) == '=') {
    bytes = new byte[(((data.length() / 4) - 1) * 3) + 1];
   } else if (data.charAt(data.length() - 1) == '=') {
    bytes = new byte[(((data.length() / 4) - 1) * 3) + 2];
   } else {
    bytes = new byte[((data.length() / 4) * 3)];
   }
   for (int i = 0, j = 0; i < (data.length() - 4); i += 4, j += 3) {
    b1 = decodingTable[data.charAt(i)];
    b2 = decodingTable[data.charAt(i + 1)];
    b3 = decodingTable[data.charAt(i + 2)];
    b4 = decodingTable[data.charAt(i + 3)];
    bytes[j] = (byte) ((b1 <> 4));
    bytes[j + 1] = (byte) ((b2 <> 2));
    bytes[j + 2] = (byte) ((b3 << 6) | b4);
   }
   if (data.charAt(data.length() - 2) == '=') {
    b1 = decodingTable[data.charAt(data.length() - 4)];
    b2 = decodingTable[data.charAt(data.length() - 3)];
    bytes[bytes.length - 1] = (byte) ((b1 <> 4));
   } else if (data.charAt(data.length() - 1) == '=') {
    b1 = decodingTable[data.charAt(data.length() - 4)];
    b2 = decodingTable[data.charAt(data.length() - 3)];
    b3 = decodingTable[data.charAt(data.length() - 2)];
    bytes[bytes.length - 2] = (byte) ((b1 <> 4));
    bytes[bytes.length - 1] = (byte) ((b2 <> 2));
   } else {
    b1 = decodingTable[data.charAt(data.length() - 4)];
    b2 = decodingTable[data.charAt(data.length() - 3)];
    b3 = decodingTable[data.charAt(data.length() - 2)];
    b4 = decodingTable[data.charAt(data.length() - 1)];
    bytes[bytes.length - 3] = (byte) ((b1 <> 4));
    bytes[bytes.length - 2] = (byte) ((b2 <> 2));
    bytes[bytes.length - 1] = (byte) ((b3 << 6) | b4);
   }
   return bytes;
}

private static byte[] discardNonBase64Bytes(byte[] data) {
   byte[] temp = new byte[data.length];
   int bytesCopied = 0;
   for (int i = 0; i < data.length; i++) {
    if (isValidBase64Byte(data[i])) {
     temp[bytesCopied++] = data[i];
    }
   }
   byte[] newData = new byte[bytesCopied];
   System.arraycopy(temp, 0, newData, 0, bytesCopied);
   return newData;
}

private static String discardNonBase64Chars(String data) {
   StringBuffer sb = new StringBuffer();
   int length = data.length();
   for (int i = 0; i < length; i++) {
    if (isValidBase64Byte((byte) (data.charAt(i)))) {
     sb.append(data.charAt(i));
    }
   }
   return sb.toString();
}

private static boolean isValidBase64Byte(byte b) {
   if (b == '=') {
    return true;
   } else if ((b = 128)) {
    return false;
   } else if (decodingTable[b] == -1) {
    return false;
   }
   return true;
}

//测试类
public static void main(String[] args) {
   String data = "wizzer@qq.com:etpass";
   byte[] result = SecBase64.encode(data.getBytes());// 加密
   System.out.println("Basic "+data);
   System.out.println("Basic "+new String(result));
   System.out.println(new String(SecBase64.decode(new String(result))));// 解密
   }
}
201011 月16
Android 2.1 GPS定位和拍照功能代码
1、GPS功能代码
private void getLocation()
    {
        LocationManager locationManager = (LocationManager) getSystemService(Context.LOCATION_SERVICE);
        locationManager.requestLocationUpdates(LocationManager.GPS_PROVIDER,
                 200, 0, locationListener);

    }
    private final LocationListener locationListener = new LocationListener() {
        public void onLocationChanged(Location location) { //当坐标改变时触发此函数,如果Provider传进相同的坐标,它就不会被触发
            // log it when the location changes
            if (location != null) {
                Lat.setText(String.valueOf(location.getLatitude()));
                Lon.setText(String.valueOf(location.getLongitude()));

            }
        }

        public void onProviderDisabled(String provider) {
        // Provider被disable时触发此函数,比如GPS被关闭
        }

        public void onProviderEnabled(String provider) {
        //  Provider被enable时触发此函数,比如GPS被打开
        }

        public void onStatusChanged(String provider, int status, Bundle extras) {
        // Provider的转态在可用、暂时不可用和无服务三个状态直接切换时触发此函数
        }
    };
2、拍照功能代码
public void onCreate(Bundle savedInstanceState) {
        super.onCreate(savedInstanceState);
     // Hide the window title.
        requestWindowFeature(Window.FEATURE_NO_TITLE);

        setContentView(R.layout.main);
        imageView = (ImageView) this.findViewById(R.id.iv1);
        Button button = (Button) this.findViewById(R.id.bt1);
        button.setOnClickListener(new OnClickListener() {
            public void onClick(View v) {
                Intent intent = new Intent("android.media.action.IMAGE_CAPTURE");
                intent.putExtra(MediaStore.EXTRA_OUTPUT, Uri
                        .fromFile(new File(Environment
                                .getExternalStorageDirectory(), "temp.jpg")));
                intent.putExtra(MediaStore.EXTRA_VIDEO_QUALITY, 0);
                startActivityForResult(intent, 0);
            }
        });

    }
    @Override
    protected void onActivityResult(int requestCode, int resultCode, Intent data) {
        if (requestCode == 0 && resultCode == Activity.RESULT_OK) {
            this.imageView.setImageDrawable(Drawable.createFromPath(new File(
                    Environment.getExternalStorageDirectory(), "temp.jpg")
                    .getAbsolutePath()));

        }
    }
3、退出程序确认
public boolean onKeyDown(int keyCode, KeyEvent event) {

        //按下键盘上返回按钮
        if(keyCode == KeyEvent.KEYCODE_BACK){
            new AlertDialog.Builder(Main.this)
            // Main.this视情况而定,这个一般是指当前显示的Activity对应的XML视窗。
            .setTitle("")// 设置对话框的标题
            .setMessage(" 确定退出? ")// 设置对话框的内容
            .setPositiveButton("确定",// 设置对话框的确认按钮
                new DialogInterface.OnClickListener() {// 设置确认按钮的事件
                    public void onClick(DialogInterface dialog, int which) {
                        //退出程序
                        android.os.Process.killProcess(android.os.Process.myPid());
                }})
            .setNegativeButton("取消",// 设置对话框的取消按钮
                new DialogInterface.OnClickListener() {// 设置取消按钮的事件
                    public void onClick(DialogInterface dialog, int which) {
                        // 如果你什么操作都不做,可以选择不写入任何代码
                        dialog.cancel();
                }}
            ).show();

            return true;
        }else{
            return super.onKeyDown(keyCode, event);
        }
    }
201011 月6
Android 2.3将于11月11日发布
Android产品主管Gaurav Jain在今年7月份时候谈及Google音乐服务的时候曾表示,该服务将于下一代智能手机操作系统Android 2.3(开发代号Gingerbread姜饼)一起发布,日期初步定在今年第四季度。如今第四季度已经过了快一半了,Android 2.3呢?
今天,国外IT网站Intomobile爆料称,据可信来源证实,Gingerbread SDK将在11月11日发布,刚好于首款采用该系统的三星Nexus Two的发布日期相近。
上月底,Google在公司总部前的草坪上新增了姜饼小人的雕塑,按照惯例,这款系统不久就会发布了。而近日发布的Google Maps 4.6版应用中也隐藏了新系统的一些踪迹,有人指出目前这款应用已经内置了部分Android 2.3版系统的界面元素。种种迹象表明,Android 2.3确实已经不远了。(来源:驱动之家[原创])
20109 月10
最封闭的开源系统:Android的八宗罪
你以为 Android 是开放的吗?Google 采用了一系列的控制手段来保证每一部 Android 手机上都有它指定的软件和硬件规格。然而,他们同时又利用 Android SDK 里面的 Apache 许可证来大肆鼓吹 Android 是开放的。
没错,Google 的移动平台是当前最聪明的利用开源来驱动商业议程的实现。但在我们深入探讨这个为什么之前,我们先说说为什么 Android 的成功和开源并没有什么关系吧。
是什么成就了 Android
虽然早期饱受质疑,Google 的 Android 移动平台已经在移动行业得到了营运商和手机厂商的广泛支持,仅剩固执的诺基亚。Android 从 08 年的一款机型发展到 10 年的 50 多款,发展之快让绝大多数的业内观察家们吃惊。
Android 的成功和开源毫无关系。它的成功依靠下列三个主要因素:
JAVA手机网[www.cnjm.net] - 苹果. 这点看起来很奇怪,Android 竟然是靠它的主要对手发家的?让我来分析下。在 iPhone 空前绝后的成功以及苹果对网络营运商傲慢苛刻的态度下,营运商们迫切的在寻找一种更便宜的选择。因此这些第一层最大的营运商们开始积极的用 Android 来开发手机给那些买不起 iPhone 的用户,更重要的是,他们不需要每卖一部手机就给 Apple 300 欧元以上的回扣。
- 全世界的营运商们迫切希望自己鹤立鸡群. Android 给他们提供了一个统一的软件平台。他们可以很方便的定制自己想要的系统,而且花费的代价也很低(3 个月的时间,这个比 SavaJe 12 个月以上的定制周期要短很多)。对大型的营运商来说,Android 也降低了他们在智能手机软件方面的投资。这也是为什么大多数的 Android 手机项目背后都是营运商和 OEM 厂商的组合。
JAVA手机网[www.cnjm.net] - 高通. 这个市值 100 亿美元的芯片厂商对 Android 的崛起功不可没。手机开发产商可以直接拿高通已经为 Android 集成好的方案,在 9-12 个月的时间内向市场上推广。(相比起来摩托罗拉的 CLIQ 花了 16 个月,而 HTC G1 则花费了 2 年多的时间)。除了高通,我们还有 TI 的 OMAP3 平台(摩托罗拉 Droid/Milestone 基于此方案)。ST Ericsson 和 Broadcom 也在做 Android 的集成方案。 JAVA手机网[www.cnjm.net] 换句话说,在 Android 手机上,大多数的 OEM 预算花在了定制方面。而 Symbian 的绝大部分预算花在无线通信的移植和硬件整合上了(Symbian 2001 年所做决定的结果)。总的来说,Android 使 OEM 厂商可以大幅削减研发预算,把钱花在定制这个刀刃上。当然我们不能忘记 Android 是免费的。这个免费让众多厂商激动不已。
话说回来,Android 用开源来做市场宣传,非常成功的搅乱了整个行业,导致了诺基亚对 Symbian 的收购以及 Windows Mobile 的全面崩溃(不过译者觉得 iPhone OS 4 的多重任务机制的发布让 WP7 真正成了杯具帝)。不过更重要的是,利用开源的名号和 Google 的魅力,Android 吸引了成千上万的开发者,虽然 Android 并不能让开发者们赚到很多钱,而且 Android 手机的数量不到苹果产品的十分之一(连支持收费的国家都比苹果少6倍)。
在开源的面纱后面
让人更惊讶的是 Android 到底有多封闭,尽管外面包裹着 Google“不作恶”的口号和 Apache 授权许可证模式。借用亨利福特在 Model-T 相关的书里的一句话:“任何人都可以自由挑选 Android 的颜色,只要那是黑色”(anyone can have Android in their own colour as long as it’s black)。Android 是一个绝好的商业案例——展现一家公司是如何用开源来赢得关注和社区参与,而且同时保持一个非常严密的商业运作。
JAVA手机网[www.cnjm.net] Google 是如何控制着每台 Android 手机里采用什么服务、软件和硬件的?这个搜索巨人建立了一套很完善的控制管理系统。为了挖掘更多的信息,我们花了两个月,和很多与 Android 有着紧密联系的内部人士进行了讨论。我们发掘出的事实让人震惊。从宏观方面说,Google 控制 Android 手机构成以下八宗罪:
1. 私有分支. Android 有多个私有分支,这些只给几个特定合作伙伴,往往是那些开发 Android 的 OEM 厂商,而且这些只提供给需要知道的人。这些私有分支比已经公布的 SDK 要超前起码 6 个月,也是 OEM 厂商可以保持竞争力的关键。而公开的 SDK 则是为第三方应用提供私有分支里发布的最新功能。
2. 封闭的评估流程. 所有的代码评估员似乎都是 Google 员工,也就是说从社区提交的代码只有 Google 才有权力决定是否接受。而且 Google 内部还流传着“并非此处发明”的一种思考文化,他们觉得 Google 员工写的代码是天下无敌。随便问任何一个给 Android 提交过补丁的人,你会得到一样的答复:几乎没有什么提交被 Google 接受,而被拒绝的时候往往没有任何理由和解释。
3. 进化的速度. Google 对 Android 的创新的速度是移动行业内绝无仅有的,他们在 18 个月里发布了四个大版本。想在 Android 上面做文章的 OEM 厂商只得紧跟 Google 的步伐(这里想起了移动杯具的OMS),不然就跟不上新功能的发布和 bug 修复。Nexus One、Droid、G1 和其它带有 Google体验应用的手机给 Google 提供了创新的测试场。
4. 不完善的软件. 用公开的 SDK 并不能完整的建造手机。缺少的几个关键的部份包括无线通信的集成模块、国际化语言包、营运商信息包以及闭源的 Google 应用,比如 Market、Gmail 和 Gtalk。虽然 Cyanogen 可以自己定制 ROM,但里面包含的那些应用没有授权,所以不能发布在商业用途的 Android 手机上。
5. 闭门的开发者社区. Android Market 是唯一一个拥有超过四万个程序并和每个手机 OEM 厂商都签有合约的 android 程序商店。这个限制很要命,因为没有一个 OEM 厂商愿意发布没有 Market 的 Android 手机(天朝是另类)。当然,在 Market 上发布应用是个非常简单的事情,没有什么审批的步骤,这个和苹果的 AppStore 刚好相反。
6. 反分化合约. 外界几乎不清楚原来 OHA 的成员都签署了反分化的合约。但这个合约更可以被理解为不能发布没有通过 CTS 兼容测试的手机。(下面细说 CTS)(译者注:貌似中国移动已经被踢出 Android 的私有分支,是不是因为他们建立的 OMS 违反了这个协定呢?)
7. 保密的发展蓝图. Android 的发展蓝图是很杯具的,到目前为止,公开发布的发展蓝图还停留在 2009 年的第一季度。如果想要看到内部的发展蓝图,你需要 Google 的赐福.
8. Android 商标. Google 掌握着 Android 的注册商标和冠名权。任何想用 Android 品牌的厂商都需要得到Google的授权。简单的说:进 Google 的门,或者没有门。如果你要自己做 Android 分枝,你就全部靠自己了,比如你需要中国移动那么大的公司。
Android 的传奇中还有个大篇章:CTS(兼容测试组),也就是 Google 一套测试 Android 手机是不是达到 Google 的标准。根据我们的线人消息,CTS 不仅仅测试软件的 API 部份,它还包括性能测试,硬件功能,设备设计,UI 用户界面需求,和机内打包的服务。CTS 决定了你可以添加额外功能,但不能从最基础的配置中削减功能。除了 CTS 以外,OEM 厂商还要和 Google 签订授权合同,这样他们才能打包 Google 的服务,比如 Gmail、YouTube 等等。
CTS 限制了 OEM 定制弱化版 Android 手机的想法(译者注:山寨的机会啊!MTK、中微星,年底发布些低端 Android 手机吧!)。这也大大限制了 Android 开拓低端市场的能力。CTS 和向前兼容 4 万多个应用的事实,极大的挑战着 Google 想占领智能手机市场2位数的市场份额目标。这些限制,还有 Google 与 OEM 亦敌亦友的合作关系,使得 OEM 圈内掀起了建立 Android 基金的讨论。
Google 的终极目标
手握 Android,Google 的目标是为自己产生收入的服务提供一个稳定的平台。在当前,这个广告生意。但未来,Google 的目标在语音服务(几十亿没有数据服务的用户)和 Google Checkout(比如变成移动领域的 visa 卡)。但不管 Google 的终极目标是什么,我们应该意识到 Android 和 Windows Mobile、Mac OSX 或 PalmOS 相比,并没有开放多少。Android 是用开源来驱动商业议程的最聪明的案例之一。Android 骨子里并没有我们潜意识里所灌输的那么多不作恶思想。
20108 月6
魅族M8:联系人同步到Gmail、Android系统方法
第一步:从M8中导出联系人为XLS格式
方法1:用魅族的PC同步工具,把联系人导出来,xls的格式(Excel)
或方法2:M8备份文件夹Contact下Contact.xml文件提取联系人为xls
可以使用M8XML2EXCEL软件,下载地址:http://bbs.meizu.cn/thread-1921470-1-1.html
第二步:XLS另外为CSV文件
打开XLS文件,选择文件-存–其他格式,选择CSV文件,提示选择是即可
第三步:注册Gmail帐户,在联络人里导入CSV文件
方法1:通过Gmail帐户同步;
或方法2:Gmail导出VCF文件,拷贝到M8中,进Android联系人导入数据。
20108 月1
魅族M8:SEPA小组 M8 Android 2.2 V3 下载
优蛋下载:http://u.115.com/file/f9a37da84d
QQ邮箱下载: http://11.dc.ftn.qq.com/ftn_handler/c51db8fa9dd761e1821afe4998d11d14474375a74a22cb2a2dabf07afc5bd4d9323588d8cdc0f6c3f3adf649ba6fab59c2fd3c1382fde0a873fe8c34e0b7a69e/SEPAV3.rar?k=59643164dfc562c4455d147d4432061c00520702070600514b575401041f000b51021c0552040d1e5f0101005500050a510552066238346023347032511c4652146476&fr=00&&txf_fid=16d480eebe485026cd195036de547d5682a6585b 提取码:fd1db243
使用说明
此版本不支持公测版。 注意:刷机有风险,请普通用户不要下载使用,仅供发烧友测试评测。
版本特性: 1. 2d加速 OK 2. 3d 加速 part OK 3. 电量显示 OK 4. 震动 OK 5. ADB 调试 OK(可以使用91手机助手) 6. Wifi OK 7. LCD & 背光 Part OK(花屏问题) 8. 电话 短信 OK 9. Gprs OK 10. 声音 Part OK(存在部分问题) 11. 视频 not work 12. 电源管理 part OK 13. 启动画面修改 14 解决中文名乱码问题
预装软件: 安卓市场 Root文件管理器 Launcher Pro ES文件管理器 任务管理器 HiAPN UCWEB 7.2 如果大家不喜欢其中的软件,可以在设置中进行卸载。
刷机方法
1. 将xip.bin复制到/Disk目录下
- 将mdroid_sepa.img复制到/Disk目录下
- 刷机
- 双启动界面选择android系统即可
注意: 1.系统启动后会扫描整个磁盘,可能导致发热和系统延迟,请尽量清除磁盘中无用资料,特别是小图片 2.如果软件无法全屏,请进入Spare Parts,将软件兼容模式(Compatibility Mode)选项去掉,重启后OK 3.长按Menu键可以进行0°,90°,180°和270°旋转 4.包中的zImage可能和面大的并不兼容。 5.双启动xip中CE的版本为9.9.17 6.由于没有使用pre-dexopt,程序第一次启动可能会比较慢
本项目SEPA小组负责成员: 雪夜刀手(http://hi.baidu.com/snownight) 阿虚(http://hi.baidu.com/aokikyon)
20107 月31
Android3.0十月发布,M9H配置正好符合
1280×760分辨率
最新发布的谷歌 Android 2.2系统带来了Flash 10.1和更快的速度,这让不少Android系统手机用户充满了期待。然而,该系统版本或许在三个月后便会成为中低端机型的配置,而谷歌正准备通过更强大的Android 3.0新版本来装备高端机型。日前,根据俄罗斯著名手机网站mobile-review.com主编Eldar Murtazin最新披露的消息显示,开发代号为“Gingerbread(姜饼)”的Android 3.0系统将有望在10月中旬推出,并且支持该版本系统手机的最低硬件配置也已经新鲜出炉。
按照Eldar Murtazin披露的说法,Android 3.0系统版本的开发代号“姜饼”,可以工作在手机或者平板电脑上,而已经问世的 Android 2.1和2.2版本则会使用在低端智能手机之上。至于即将于10月中旬推出的Android 3.0版本的最低系统需求则是需要1GHz的处理器,512M内存和3.5英寸触控屏,当然它支持更大的屏幕和更高的分辨率。比如该版本系统将支持4.0 英寸屏幕和支持1280×760像素的高分辨率等等。除此之外,如过去传闻所说的那样,新版本会开发新的操作界面,预计将拥有一个同时支持多种设备的统一的界面,并且谷歌在Android 3.0版本系统中会关闭第三方用户界面的开发接口,比如我们熟悉的摩托罗拉的Motorblur和HTC Sense等等,这意味着所有第三方界面均无法运行在该版本之上。据悉,Android 3.0版本系统大约会在10月15日或是16日左右正式发布,首批支持该版本的机型则会在11月或是12月开始销售。
20107 月27
摩托罗拉或推Android 3.0平板电脑挑战iPad
新浪科技讯 北京时间7月27日晚间消息,据国外媒体报道,知情人士透露,摩托罗拉将推出一款10英寸平板电脑挑战苹果iPad。
美国投资银行Rodman & Renshaw分析师阿绍科·库马尔(Ashok Kumar)称,摩托罗拉年底将推出一款10英寸的平板电脑,基于谷歌Android OS 3.0系统。此外,另一名业内分析师罗格·克伦肖(Roger Crenshaw)也获得了同样的消息。
当前,已经有厂商推出了基于Android的平板电脑。但在Android市场,摩托罗拉和宏达电是最强大的两家厂商,相信摩托罗拉会利用其与Verizon等移动运营商的合作关系来推广这款设备。
目前,有关该款平板电脑的其他硬件信息还不清楚,但预计将采用基于ARM架构的高通处理器、至少512MB RAM,内置Wi-Fi和加速计等功能。(李明)
20107 月25
魅族M8:Android 2.2固件下载(面大A8.1 & A8评测)
A8.1下载及更新
SEPA &LBE A8.1修改版基于已经发布的Android A8版本
主要修改如下 1. 由于android2.2 权限问题,造成部分需要提权的软件无法使用的问题。 2. 修改wifi连接配置文件,修复部分手机无法获得dns,无法上网的问题(仅M8 se测试通过) 3. 预装部分软件(root explorer、es文件浏览器、ucweb、手机qq、案桌市场、搜狗输入法) 4. 修复自带的谷歌拼音输入法一直崩溃的问题。
下载地址: http://down.m8fans.com/soft-1299.html
A8下载及评测
优蛋下载:http://u.115.com/file/f85560fd06 迅雷下载:thunder://QUFodHRwOi8vZG93bi5tOGZhbnMuY29tL0Rvd25sb2FkVHJhbnNmZXIuYXNweD9zb2Z0aWQ9MTI5OSZ1cmw9MFpa
————————————–完美分割线—————————————– 刷机步骤:将下载好的xip.bin和mdroid.img直接放到M8根目录 之前的xip.bin,mdroid.img和mpatch.img都删除了,只留A8的xip.bin和mdroid.img 关机,正常刷机即可
————————————–完美分割线—————————————– 新功能:
- 升级至Android 2.2 release 1.1 性能和流畅度得到大幅提升
- 电话部分: 正常支持通话、短信功能 在魅族工程师的帮助下,初步解决了GPRS的问题。在南京移动2G卡上测试成功,但是在南京联通3G卡上测试失败。 因为电话模块不能开源,所以GPRS的问题预计难以修复。
- WIFI部分: 支持WIFI开启与关闭,支持WIFI电源管理,支持Marvell SDIO 8688的Deepsleep省电模式 修复了中文SSID自动重启的问题 改善了DHCP支持,在无法获得DNS地址的情况下会自动设置DNS为网关地址
- 电源部分: 完善了电源管理,降低了发热,支持关屏模式并实现部分设备的待机 修复了关屏无法唤醒的问题
- 图像部分: 默认竖屏,并支持旋转至横屏 支持2D,3D加速,3D加速支持OpenGL ES 1.1和OpenGL ES 2.0
- SD卡 可以在系统中正常使用SD卡了
- 修改了按键映射 M键:对应Back (不变) 音量增加键:对应Menu 音量降低键:对应Home 电源键:对应电源键
- 屏幕: 修复了PET屏重启后失效的问题 支持2点触摸
- USB连接 取消了Telnet连接方式,改用ADB驱动,可以使用91手机助手等工具直接连接M8
已知问题:
- 蓝牙功能无法使用
- 无法使用耳机Mic进行通话
- 使用电源键关闭后无法开机,必须拔电池
- 目前的待机并非真正的待机模式,会快速损耗电力,所以不用时请记得关机
————————————–完美分割线—————————————– CE固件启动正常,进入A系统后再进入CE系统,时间依然快6年(老问题不谈了)
A8在继承了A7优良血统的同时,添加了GPRS(貌似只能用移动的,联通不能用),SD卡读取,竖屏,待机锁屏,关机和Android 2.2系统等新东西 系统运行所未有的流畅,可以说是M8目前最好用,最流畅的Android固件,支持SIM卡复制联系人到Android系统,但是只能全部复制 不能单个复制。复制教程:进入电话,点联系人,点上音量键,会弹出菜单,最后一个就是导入导出 同时还支持图片两点触摸放大缩小~!!手机散热正常
但是,A8同样也失去和退化了某些功能 1.重力感应(面大更新里面说有重力感应,我使用了4个小时,愣是没有发现有重力感应,重力感应开关我是打开了的) 2.电影播放只有声音没有画面 3.音乐不能直接通过桌面图标进去收听,只能通过SD卡进去听歌(面大说要刷新很久,很久是非常久) 而且还只能一首一首的听,不能连续播放。 4.图片也只能是通过SD卡进去观看,也是只能一张一张的看,不能连续看,不支持GIF格式的动态展示,GIF打开是静态 5.不支持动态桌面 6.Gameloft游戏全线败北,都不能正常游戏 ————————————–完美分割线—————————————–
20107 月6
Android 3.0战略:Google欲强制性超越苹果?
随着苹果iPad和iPhone4上市后的火爆热销,似乎已经没有什么力量可以阻挡苹果前进的脚步。虽然业内一直期待可以与其一决高下的Google的Android能够有所作为,事实也证明Android是除了苹果的iPhone外,在智能手机市场份额和增长速度表现最佳的,但最新的统计显示,苹果的iPhone,加上iPad的助力,苹果在移动平台的大战中仍然以较大的优势领先于Android。而更让Google着急的是,由于平台上的优势,苹果于 7月1日正式推出的移动广告平台iAds,据称已经获得了有兴趣参与的企业价值6000万美元的订单。面对收获颇丰的苹果,Google何以应对?
苹果的iPhone和Google的Android一直被业内认为是在移动互联网领域(智能手机平台及市场)最直接的竞争对手。但事实却是,Google的Android无论是在应用程序数量还是在基于Android平台的硬件(智能手机)的出货量上都要落后于苹果的iPhone,而且苹果自身仰仗着庞大的用户基数仍在增长。所以对于Google来说,要想缩短差距,甚至在未来像业内预计的超越苹果的话,唯有让自己跑得更快些,尽管目前Google Android的增速已经不慢。但要是让自己的增速更快,Google的突破口在哪里?也就是说Google通过什么方式来获得更快的加速度?
从智能手机市场的竞争看,无非是硬件、操作系统和应用程序综合实力的比拼。以此来衡量Google和苹果,Google要想在应用程序上赶超苹果,难度很大,虽然目前基于Google Android的应用已经达到了8万左右,但与苹果App Store的22.5万的应用相比,确是小巫见大巫。那剩下的只有硬件和操作系统。而Google却只有Android操作系统,毫无疑问,Google惟有通过操作系统影响硬件的性能表现来获得更快的增长加速度。而所幸的是,苹果新的iPhone4及iOS4的搭配似乎给了Google突破的机会。据称,由于苹果iOS4首次支持多任务处理(这也是iOS4最大的卖点之一),而导致iPhone4性能的下降,例如有用户称,安装iOS4之后,iPhone 运行变得不可思议的慢。还有用户说iOS4存在备份慢的问题。而这主要和苹果iPhone4采用自家A4处理器在性能和功耗间的取舍和平衡有关。
也许Google自己已经意识到了苹果在超速发展中的软肋,在日前曝光的Google下一代Android 3.0 Gingerbread系统中,一向以开放自诩的Google首次对采用该系统的终端(例如智能手机)的硬件配置提出了强制性的要求。而这些强制性要求的提出预示着Google的Android战略开始真正清晰起来。
据相关报道,Android3.0系统将最低运行配置提高到1GHz CPU,512MB RAM,同时很好的支持4英寸及以上级别的显示屏,所支持分辨率达到1280×760。同时,Android 3.0系统将会完全更改用户界面,即Android 3.0系统将会弃用第三方用户界面,如之前HTC的HTC Sense,摩托罗拉的MotoBlur等。这意味着不管是哪家合作伙伴,只要采用Android 3.0系统的智能手机都将具有统一的操作界面。
如果用这些Google强制性的指标看,当前多数的基于Android 2.1和2.2系统的智能手机都只是入门级的产品,而Android3.0系统的智能手机无疑定位在高端,加上统一的界面,人们很自然地就会想到它的对手苹果的iPhone。只是这种配置的智能手机的性能要远高于苹果的iPhone(包括最新的iPhone4)。说到这里,笔者顺便提及的是近日苹果iPhone4遭遇的信号接收的问题,为此,苹果还遭受了对手的冷嘲热讽。至于原因,有的认为是硬件本身的设计缺陷所致,但苹果称该问题可通过iOS4的升级予以解决。如果真是这样的话,至少可以证明操作系统与硬件性能本身之间密切的联系,也让Google从中感悟到也许之前没有界定的随意在任何配置的智能手机上搭载自己的Android系统,远未发挥出其系统真正的优势。
其实在Google的Android3.0的信息未被披露前,其战略合作伙伴摩托罗拉就已经对外宣称要在今年的下半年发布采用2GHz处理器的Android系统的智能手机,而Google的另一个合作伙伴HTC据称也正在为Sprint开发一款配备2GHz处理器开发代号为Sabor的采用Android3.0系统的智能手机。Google、摩托罗拉、HTC三者间是不谋而合?还是早在计划之中?不管怎样,当Google的Android3.0发布的时候,基于该系统的智能手机的性能将会是打击苹果iPhone的利器。
当然,除了像摩托罗拉和HTC这些终端战略合作伙伴的支持外,Google之所以采用这种从芯片层面就采取强制性的要求和芯片厂商的大力支持也是密不可分的。由于苹果的iPhone和iPad都采用自家的芯片,这让智能手机芯片厂商的老大ARM自然站到了Google的Android阵营。ARM近日宣布,今后新投资战略重点将放在Android手机芯片生产上。与此同时,全球芯片厂商的老大英特尔也破天荒地宣布其针对智能手机市场的芯片率先支持Google的Android系统。有了这两家芯片厂商的支持,Google自然是底气十足,这种底气的体现是,尽管Android3.0要求的配置很高,但在功耗和待机时间上又不会输于苹果。
另外就是Android3.0的统一界面让使用不同合作伙伴的终端的用户能够得到近乎一致的使用体验,这一点和苹果的iPhone达到了相似,又避免了之前不同厂商的智能手机,不同的界面所导致的用户使用的差异。还有就是Android3.0系统强制性的高要求,让Google正式把Android分割为两部分。Android 3.0系统或以上版本将会支持高端产品(直接与苹果iPhone竞争),Android 2.1和2.2将面向低端、廉价手机市场(从诺基亚和微软那里夺取可能会流失到苹果iPhone的市场份额)。这不但清晰了Android的市场定位,又能让硬件和系统的配合发挥出最大的效力。
综上所述,笔者认为,未来Google Android3.0系统的登场是Google在苹果iPhone压力下采取的强制性超越的战略,这个战略的核心就是通过操作系统对于智能手机硬件本身高配的要求,以性能突击苹果iPhone封闭产业链中最为薄弱的一环,至于能否达到预期的效果,即进一步加快扩大Google Android市场份额的速度或遏制苹果iPhone的扩张,还要看Google执行的力度及苹果的反应。
20107 月1
收藏:魅族M8 Android内核源码和固件下载
魅族官方提供了M8的Android内核源码,包含了完整的驱动以及说明,由于MEIZU M8的物理硬件和iPhone一样平时操作的只有1个Home键无法模拟,Android的Back、Menu以及其他因素魅族放弃了M8跑Android的计划。由于M8使用的是Samsung ARM11内核的S3C6410工作频率为667MHz,山寨厂商有一定的借鉴价值。
有关魅族M8的ADB驱动 http://m8-android-kernel.googlecode.com/files/M8_6410_adb_driver.rar
M8的Android编译好固件下载,刷机方法和Wince的一致,下载后直接解压放到USB Storage的根目录 http://code.google.com/p/m8-android-kernel/source/browse/bin/m8_android.rar
M8 for Android源码托管在Google Code上面,使用SVN工具直接提取 浏览地址 http://code.google.com/p/m8-android-kernel/source/browse/#svn/trunk 需要注意的是Android开发网发现有关Modem这块代码没有,涉及到了英飞凌的机密,不过可以看到编译好的库,直接挂上即可。
SVN Checkout地址 http://m8-android-kernel.googlecode.com/svn/trunk
最后是Android123找到的有关M8的移植文章网上整理的word文档,有兴趣的网友可以DIY下,不过Android开发网表示Android和M8原始的Wince比较差距较大,个人还是建议使用完善的WinCE系统,毕竟可以直播RMVB、WinCE对于M8更适合些。
1. make menuconfig
A. 串口改成串口3输出打印信息。 (一) (root=/dev/nfs init=/init nfsroot=192.168.1.10:/nfs ip=192.168.1.100 console=ttySAC2,115200 console=ttySAC2,串口2输出,必须与下面同时修改 (二) System Type —>S3C UART to use for low-level messages—>2 值设成2,即串口2输出,必须与上面同时修改。
B. Onenand驱动支持 (一) Device Drivers —>Memory Technology Device (MTD) support —>OneNAND Device Support —> [] Verify OneNAND page writes <> OneNAND Flash device via platform device driver (二) onenand的支持 从贺超提供的linux2.6.27包drivers\mtd\onenand目录复制s3c6410.h,s3c_onenand.c,s3c_onenand.h提供对三星onenand的支持 (三) Makefile修改 drivers\mtd\onenand\Makefile文件最后添加一行:onenand-objs = s3c_onenand.o,编译s3c_onenand.o,连接进内核。 (四) 在arch\arm\mach-s3c6410\mach-smdk6410.c中 static struct platform_device pmem_gpu1_device = { .name = “android_pmem”, .id = 1, .dev = { .platform_data = &pmem_gpu1_pdata }, }; #endif 的后面添加代码: /add by liuyihui 2009-08-21/ / 添加onenand驱动支持 / / OneNAND Controller / / OneNAND flash controller / #define S3C64XX_PA_ONENAND (0x70100000) #define S3C64XX_SZ_ONENAND SZ_1M static struct resource s3c_onenand_resource[] = { [0] = { .start = S3C64XX_PA_ONENAND, .end = S3C64XX_PA_ONENAND + S3C64XX_SZ_ONENAND – 1, .flags = IORESOURCE_MEM, } }; 或者替换新的代码: arch\arm\plat-s3c64xx\devs.c, linux/arch/arm/mach-s3c6400/include/mach/map.h struct platform_device s3c_device_onenand = { .name = “onenand”, .id = -1, .num_resources = ARRAY_SIZE(s3c_onenand_resource), .resource = s3c_onenand_resource, .dev.platform_data = &s3c_nand_mtd_part_info }; /add end/ 在数组static struct platform_device smdk6410_devices[] __initdata = {的最后添加: &s3c_device_onenand /add by liuyihui 2009-08-21/ (五) 分区表修改:使userdata从0x0a000000开始 文件linux/arch/arm/plat-s3c/include/plat/partition.h中: { .name = “cache”, .offset = MTDPART_OFS_APPEND, .size = (67SZ_1M)+0x1000000,//orig:(67SZ_1M)/modified by cefanty 2009-08-21/ }, (六) 修改drivers\mtd\onenand\generic.c 复制drivers\mtd\onenand\generic.c替换掉。
C. Device Drivers —>Input device support —> [] Keyboards —> (一) 暂时去掉键盘支持,因为键盘占用了GPK14口,GPK14口在M8是USB供电开关的GPIO,拉高才能用USB
D. Device Drivers —> [] USB support —> <> USB Gadget Support —> (一) <> USB Gadget Drivers (Ethernet Gadget (with CDC Ethernet supp (二) Ethernet Gadget (with CDC Ethernet support) (三) [ ] RNDIS support (四) d.1)选择Ethernet Gadget (with CDC Ethernet supp,用于把M8模拟成网卡,实现nfs挂载系统。同时去掉RNDIS support支持,因为ubuntu下没有驱动支持。 (五) drivers\usb\gadget\s3c-udc-otg-hs.c修改为USB使用外部晶振 //writel(0x20, S3C_USBOTG_PHYCLK); /commented by liuyihui 2009-08-24/ writel(0x00, S3C_USBOTG_PHYCLK); /00:USB使用外部晶振。modified by liuyihui 2009-08-24*/
2. 驱动移植和修改
A. LCD驱动移植 i. drivers\video\Kconfig,搜索config FB_S3C_LTS222QV,在后面添加如下选项 config FB_S3C_LMS340KC01 bool “LMS340KC01” —help— TBA ii. 添加驱动:drivers\video\samsung\s3cfb_lms340kc01.c a) 复制刘奕辉开发的s3cfb_lms340kc01.c驱动到目录drivers\video\samsung\ b) 在drivers\video\samsung\Makefile文件最后添加内容: obj-$(CONFIG_FB_S3C_LMS340KC01) += s3cfb_lms340kc01.o iii. 修改drivers\video\samsung\s3cfb_fimd4x.c,在函数s3cfb_set_gpio最后注释代码,添加:
#if 0/commented by liuyihui 2009-08-24/ / module reset / if (gpio_is_valid(S3C64XX_GPN(5))) { err = gpio_request(S3C64XX_GPN(5), “GPN”);
if (err) { printk(KERN_ERR “failed to request GPN for ” “lcd reset control\n”); return err; }
gpio_direction_output(S3C64XX_GPN(5), 1); }
mdelay(100);
gpio_set_value(S3C64XX_GPN(5), 0); mdelay(10);
gpio_set_value(S3C64XX_GPN(5), 1); mdelay(10);
gpio_free(S3C64XX_GPF(15)); gpio_free(S3C64XX_GPN(5)); #endif
/add by liuyihui 2009-08-24/ / 打开M8 LCD需要用到的GPIO口 / #if 1 //M8 GPIO set hight / module reset ///LCD_nRESET_SHIFT/4*/ if (gpio_is_valid(S3C64XX_GPQ(4))) { err = gpio_request(S3C64XX_GPQ(4), “GPQ”);
if (err) { printk(KERN_ERR “failed to request GPQ for ” “lcd reset control\n”); return err; } gpio_direction_output(S3C64XX_GPQ(4), 1); } mdelay(100); gpio_free(S3C64XX_GPQ(4));
/ module reset ///LCD_nSS_SHIFT/5/ if (gpio_is_valid(S3C64XX_GPQ(5))) { err = gpio_request(S3C64XX_GPQ(5), “GPQ”);
if (err) { printk(KERN_ERR “failed to request GPQ for ” “lcd reset control\n”); return err; } gpio_direction_output(S3C64XX_GPQ(5), 0); } mdelay(100); gpio_free(S3C64XX_GPQ(5)); / module reset ///LCD_MOSI_SHIFT/7/ if (gpio_is_valid(S3C64XX_GPQ(6))) { err = gpio_request(S3C64XX_GPQ(6), “GPQ”);
if (err) { printk(KERN_ERR “failed to request GPQ for ” “lcd reset control\n”); return err; } gpio_direction_output(S3C64XX_GPQ(6), 1); } mdelay(100); gpio_free(S3C64XX_GPQ(6)); / module reset ///LCD_MOSI_SHIFT/7/ if (gpio_is_valid(S3C64XX_GPQ(7))) { err = gpio_request(S3C64XX_GPQ(7), “GPQ”);
if (err) { printk(KERN_ERR “failed to request GPQ for ” “lcd reset control\n”); return err; } gpio_direction_output(S3C64XX_GPQ(7), 1); } mdelay(100); gpio_free(S3C64XX_GPQ(7)); / module reset ///LCD_CLK_SHIFT/8/ if (gpio_is_valid(S3C64XX_GPQ(8))) { err = gpio_request(S3C64XX_GPQ(8), “GPQ”);
if (err) { printk(KERN_ERR “failed to request GPQ for ” “lcd reset control\n”); return err; } gpio_direction_output(S3C64XX_GPQ(8), 1); } mdelay(100); gpio_free(S3C64XX_GPQ(8));
#endif
return 0; } /add end/ c) iv. 修改drivers\video\samsung\s3cfb_spi.c,在函数s3cfb_set_gpio最后注释代码,添加: 在代码#elif defined(CONFIG_PLAT_S3C64XX)后面添加:
#define MEIZU_M8 #ifdef MEIZU_M8 #define S3C_FB_SPI_CLK(x) (S3C64XX_GPQ(8 + ( 4))) #define S3C_FB_SPI_MOSI(x) (S3C64XX_GPQ(7 + (4))) #define S3C_FB_SPI_CS(x) (S3C64XX_GPQ(6 + (4))) #else #define S3C_FB_SPI_CLK(x) (S3C64XX_GPC(1 + (ch 4))) #define S3C_FB_SPI_MOSI(x) (S3C64XX_GPC(2 + (ch 4))) #define S3C_FB_SPI_CS(x) (S3C64XX_GPC(3 + (ch * 4))) #endif
B. 触摸屏移植 drivers\input\touchscreen:synaptics510_i2c.c,synaptics510_i2c.h,Makefile,Kconfig C. 按键移植 覆盖如下文件:目录drivers\input\keyboard\下的:gpio_keys.c
3. Busybox在Android上的使用
To build busybox • Download the latest version of busybox from the following website. At the time of writing the latest version was v.1.13.3. http://www.busybox.net • Extract the busybox source: tar jxf busybox-1.13.3.tar.bz2 • Configure busybox by running menuconfig cd busybox-1.13.3/ make menuconfig • In menuconfig set the following options Busybox Settings –> Build Options –> Build Busybox as a static binary (no shared libs) – Enable this option by pressing “Y” Busybox Settings –> Build Options –> Cross compiler prefix – Set this option equal to “arm-none-linux-gnueabi-” Busybox Settings –> Installation Options –> Don’t use /usr – Enable this option by pressing “Y” Linux Module Utilities —> [ ] Simplified modutils 这项不能选,否则insmod 驱动模块加载会提示找不到*.ko驱动文件的路径 • Export path to where the cross-compiler is located on the host, for example: export PATH=/opt/arm/arm-2007q3/bin:$PATH • Build busybox make Installing Busybox
To install busybox in the target file-system • Create a /bin directory in the target file-system. For example: mkdir //bin • Copy the busybox binary to the /bin directory in the target file-system cp busybox //bin • Install the busybox command line tools on the target by executing the following commands: cd /bin ./busybox –install Make the Busybox shell the default shell
To make the busybox shell the default shell, edit the file “init.rc” in the target file-system as follows: • Edit the console service so that it runs the busybox shell and not the default shell by replacing: service console /system/bin/sh With: service console /bin/sh • Add the path of the busybox command line tools to the system path variable by replacing: export PATH /sbin:/system/sbin:/system/bin:/system/xbin With export PATH /bin:/sbin:/system/sbin:/system/bin:/system/xbin
Android cupcake 1.5版移植
1. 在Android挂载SD移植
cupcake 1.5版需要改写下列文件。
A. 编译mountd,并在文件系统中启动这一服务。
修改 system/core/mountd/Android.mk文件,开放最后一行
# disabled – we are using vold now instead # include $(BUILD_EXECUTABLE) 为:
# disabled – we are using vold now instead include $(BUILD_EXECUTABLE)
B. 增加 安装mountd.conf 文件
修改 system/core/rootdir/init.rc文件
释放下两行:
service mountd /system/bin/mountd socket mountd stream 0660 root mount C. 修改 system/core/rootdir/Android.mk 文件, 增加 etc/mountd.conf \,如下:
copy_from := \ etc/dbus.conf \ etc/init.goldfish.sh \ etc/mountd.conf \ etc/hosts D. 修改根文件系统的system\etc \mountd.conf文件: block_device /dev/block/mmcblk0
20106 月28
第三方开发者看好Android
手机软件工具供应商Appcelerator周三发布报告称,在谷歌Android操作系统 和苹果的iOS之间,第三方独立开发者更看好Android的发展前景。Appcelerator 对2733名第三方独立开发者进行了调查。调查结果显示,超过半数的被调查者表示在智能手机操作系统当中谷歌Android最具长期潜力,而支持苹果 iOS的开发者约为40%。该调查结果暗示,Android正在蚕食苹果iOS的市场份额。谷歌公布的数据表示,全球目前约有60款采用Android操 作系统的设备,6万款可供下载的应用,每天新增超过10万 Android用户。市场调研公司Gartner此前也发布报告称,Android将会在2012年超越iOS,在全球最流行的手机操作系统中排名第二。
Appcelerator营销副总裁斯科特·斯瓦茨佐夫(Scott Schwarzhoff)表示:“谷歌和苹果正在参与一场竞赛,而其他人则在追赶。”Android不仅在智能手机市场对苹果、微软、RIM、Palm和 全球最流行的操作系统Symbian等构成威胁,包括索尼、罗技和东芝等10多家厂商都将推出平板电脑、上网本、机顶盒、电子书阅读器和电视等采用 Android操作系统的产品。
Gartner副总裁肯·杜兰尼(Ken Dulaney)表示,“Android是目前唯一有资格取代iOS的产品。”截至目前,苹果发言人史蒂夫·道宁(Steve Dowling)对此报道未置可否。
重新上演PC大战
智能手机操作系统的竞争就如同是上世纪80年代至90年代初苹果与微软之间的PC大战,当时的 PC操作系统市场仍被群雄分割。美国移动运营商Sprint Nextel营销副总裁大卫·欧文斯(David Owens)说:“微软和苹果之间的PC大战又在手机市场重新上演。”Sprint Nextel在去年年底引入采用Android操作系统的手机。该公司在本月发布了宏达电的Evo 4G,这款手机发布首日的销量也创出Sprint Nextel首日手机销量之最。
市场调研公司IDC的统计数据显示,受 Android操作系统的推动,今年第一季度宏达电在美国智能手机市场的分额从去年第三季度的7.3%增加至9.4%。与此同时,摩托罗拉的市场份额也从 2.1%增至12.4%。IDC项目总监威尔·斯托费加(Will Stofega)表示,“手机制造商也认识到了这一点,Android未来将会给他们带来帮助。”
手机制造商跟风
移动运营商 Verizon无线透露,摩托罗拉计划于本周三推出新款Android手机,而此前推出的Droid已经十分风靡。三星电子重金打造的Galaxy S智能手机同样采用Android操作系统。三星通信美国公司战略副总裁贾斯汀·德尼森(Justin Denison)表示:“Galaxy S是三星电子今年最重要的一款高端智能手机。”
移动运营商同样对Android倍加 青睐。作为iPhone的独家服务供应商,AT&T也渴望提供Android手机。今年3月,AT&T推出了首款Android手机,6 月推出了HTC Aria,而即将推出三星Captivate。AT&T发言人道恩·本顿(Dawn Benton)表示,“我们正计划丰富Android产品线。”
知 名品牌
Android之所以能够迅速普及,与谷歌的支持和品牌知 名度不无关系。Sprint Nextel的欧文斯表示,“几乎所有人都知道Android是谷歌的产品,这种认知转变成消费者的兴趣。”
价格优势同样是Android手机被认可的重要原因。在过去的6个月里,Verizon无线推出了 两款Droid手机,售价仅为1美元。目前Droid Eris在签署两年服务合约的前提下,售价50美元。相比之下,iPhone最低售价99美元,在6月24日上市的iPhone 4起始售价199美元。
许多手机厂商正在开发更廉价的Android智能手机。Gartner副总裁杜兰尼称:“这些低 端智能手机将于今年晚些时候上市。”Android早期存在的漏洞都已被修复,而且该软件提供了越来越多的功能。IDC的斯托费加表示,“手机制造商从这 些错误中吸取了许多的经验。Android如今已变得非常成熟。”
20106 月26
Android开发 ADT插件安装
安装Eclipse 插件(ADT) 要下载和安装ADT 插件,跟着Google 提供给开发者的步骤:
- 启动Eclipse,接着选择”Help”>”Software Updates”>”Find and Insta ll”
- 在出现的对话框中,选择”Search for new features to insta ll” 点击”New”
- 点击”New Remote Site”
- 在结果对话框中,为远程站点键入一个名称(如:Android Plugin)并键入 这个URL 作为它的URL: https://dl-ssl.google.com/android/eclipse/ 点击OK。(可能要翻哦墙哦)
- 现在你应该看到新站点加载到搜索列表中(并选中),点击”Finish”。
- 在后来搜索结果对话框中,选择”Android Plugin”>”Developer Tools”复选 框。这将会选择”Android Developer Tools”和”Android Editors”特性。 Android Editors 特性是可选的,但是推荐。 现在点击”Newt”
- 阅读许可协议,选择”Accept terms of th license agreement”, 点击”Next”
- 点击”Finish”
- ADT 插件没有被签名;总之,你可以点击”Insta ll All”接受安装
- 重启Eclipse
- 在重启后,更新你的Eclipse 配置来指向SDK 目录: a.选择”Window”>”Preferences” 来打开配置面板。(Mac OS X:”Eclipse”>”Preferences”) b.从左边面板中选择”Android” c.对于主面板中”SDK Location”,点击”Browse”并选中SDK 目录位置 d.点击”Apply”,接着点”OK”