2022 8 月2
设置网关gateway IP 为爱快IP地址即可:
vi /etc/config/networkconfig interface 'lan'
option type 'bridge'
option ifname 'eth0'
option proto 'static'
option ipaddr '10.10.10.2'
option netmask '255.255.255.0'
option gateway '10.10.10.1'
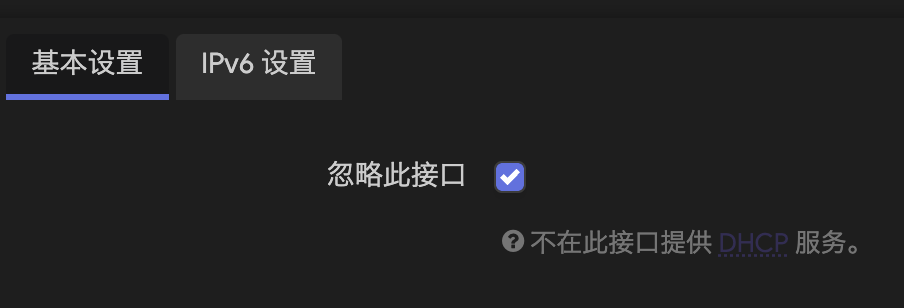
ps:记得把openwrt 后台 DHCP 忽略此接口勾选上。
2022 7 月31
前因:
电信免费升级到千兆宽带,趁机将全屋网络设备升级一下:
1)J1900 软路由4口千兆 -> J4125 软路由6口2.5G;
2)TPlink XDR6080 自带SFP口 -> 购入一个电口2.5G SFP模块;
3)群晖DS920+ -> 购入USB3.0 2.5G网卡。
后果(坑):
1、J4125软路由的坑:
1)Exsi + Openwrt 跑不满千兆带宽,电信光猫直连可以跑950mbps,它只能跑770mbps;
2)PVE 7.2-3 + Openwrt 和 PVE + iKuai 启动时插好的网线可以正常运行,但新插网线到空闲口,然后联网测速就会断网、死机,必须重启才能恢复。
直接跑 Openwrt 或 直接安装 iKuai 系统,可以正常运行。
2、群晖NAS的坑(最后发现不是群晖本身问题):
1)2.5G网卡连接不稳定,总是过一会或半天断开连接;
2)移动硬盘一会报连接上了,一会报未安全退出;
3)有2块硬盘重新连接次数一直在增加,没有规律,一会系统卡顿一下,次数就会加几次;
4)还有一块8T硬盘,干脆直接报损毁了!欲哭无泪(好在质保期内已送修)。
经过反复的验证,各种方法,一开始怀疑是硬盘坏了、又怀疑是电压不稳(连UPS还能电压不稳?UPS坏了?)、又怀疑有静电,然后搬出网络机柜运行,都不能解决。
最终发现罪魁祸首是 Tplink 2.5G 电口SFP模块 !虽然它没有插网线,但是插在XDR6080上,XDR6080其他网口的网线插在软路由器上,其他设备也是插在软路由上。什么原因我确实不清楚,不知道是静电问题还是频率干扰,总之拔掉它,NAS的硬盘的重新连接次数终于不涨了!移动硬盘也可以一直正常连接了!
普联 TP-LINK 2.5G SFP电口模块 TL-SM410U长这样:
3、XDR6080无线网络变差
1)外网查看摄像头实时录像,画面一卡一顿,甚至打不开;
2)室内信号强度非常差,手机网络经常断开。
罪魁祸首还是 Tplink 2.5G 电口SFP模块 !虽然它没有插网线,但是插在XDR6080上。
巨坑。
ps:折腾无止境,人到中年男人就这些爱好了?。。
2022 7 月26
1、PVE安装 openwrt
固件下载地址 Lenyu2020/Actions-OpenWrt-x86/releases ,PVE后台上传img文件
PVE创建虚拟机,删除硬盘,然后执行命令将固件加到虚拟机下,然后调整硬盘大小
qm importdisk 101 /var/lib/vz/template/iso/openwrt_x86-64-2207161818_5.15.55_uefi-gpt_dev_Lenyu.img local-lvm2、openwrt安装 caddy2
官网下载链接:https://caddyserver.com/download
Platform: Linux amd64,选中 mholt/caddy-webdav 下载可执行文件,重命名为 caddy
openwrt管理后台上传到openwrt,然后ssh命令行 mv 到 /home 文件夹
chmod 777 caddy

./caddy hash-password --plaintext 明文密码
创建配置文件
vim Caddyfile

{
    order webdav last
}
:8080 {
    encode gzip
    basicauth {
        用户名 加密格式密码
    }
    webdav {
        root /mnt
        prefix /webdav
    }
}
启动命令
./caddy run --config Caddyfile
vim /etc/init.d/caddy#!/bin/sh /etc/rc.common
START=99
SERVICE_USE_PID=1
SERVICE_WRITE_PID=1
SERVICE_DAEMONIZE=1
start() {
service_start /home/caddy run --config /home/Caddyfile
}
stop() {
service_stop /home/caddy
}
添加执行权限 chmod +x /etc/init.d/caddy 设置开机启动 /etc/init.d/caddy enable,启动服务 /etc/init.d/caddy start
3、PVE挂载硬盘到openwrt
PVE ssh
ls /dev/disk/by-id会显示一堆磁盘信息,其中有类似 ata-ST1000LM024_HN-M101MBB_S2ZWJ9AFxxxxxx 的信息
qm set 101 -scsi1 /dev/disk/by-id/ata-ST1000LM024_HN-M101MBB_S2ZWJ9AFxxxxxx提示成功 update VM 101 : -scsi1 /dev/disk/by-id/ata-ST1000LM024_HN-M101MBB_S2ZWJ9AFxxxxxx
注意:-scsi1 或是 -sata1 是创建虚拟机的磁盘控制器类型决定
openwrt管理后台-挂载点,就可以看到新的挂载信息:
/dev/sdb1 /mnt/sdb14、修改 Caddyfile 配置文件,将路径修改为磁盘路径
root /mnt/sdb1浏览器访问 http://IP:8080/webdav
2022 6 月8
GRANT ALL PRIVILEGES ON *.* TO 'root'@'10.10.10.10' identified by 'pass123';

FLUSH PRIVILEGES;
2022 6 月8
CREATE TABLESPACE DEMO LOGGING DATAFILE '/opt/oracle/oradata/ORCLCDB/DEMO.dbf'  SIZE 200M AUTOEXTEND ON NEXT 32M MAXSIZE 500M EXTENT MANAGEMENT LOCAL;

create temporary tablespace DEMO_TEMP tempfile '/opt/oracle/oradata/ORCLCDB/DEMO_TEMP.dbf' size 100m autoextend on next 32m maxsize 500m extent management local;

alter session set "_ORACLE_SCRIPT"=true;

create user DEMO identified by DEMO default tablespace DEMO temporary tablespace DEMO_TEMP;

alter user DEMO identified by DEMO;

grant connect,resource,dba to DEMO;

alter user DEMO quota unlimited on users;
2022 1 月20
同事带我们去一个偏僻的农家乐吃饭,有个上小学的小姑娘给我们端菜,端第一道菜扎着头发,端第二道菜又披着头发,来来回回好几次。我就问同事:“这小姑娘是不是人格分裂?” 同事说:“这是双胞胎。”
2021 10 月18
nvm 切换node版本
nvm alias default 14nvm use 14nodes-sass 安装
npm install --target_arch=x64
2021 9 月22
1、打开终端,粘贴如下内容,注意加上空格
sudo xattr -rd com.apple.quarantine 2、从访达的应用程序中把App拖到终端执行:
sudo xattr -rd com.apple.quarantine /Applications/Parallels\ Desktop.app
2021 9 月17
location /api/v1 {
        set $is_matched 0;
        if ($request_uri ~ /api/v1/user/100001/ ) {
            proxy_pass https://127.0.0.1:1001/;
            set $is_matched 1;
        }

        if ($request_uri ~ /api/v1/user/100002/ ) {
            proxy_pass https://127.0.0.1:1001/;
            set $is_matched 1;
        }

        # 没有匹配到,跳转到默认页面
        if ($is_matched = 0) {
            proxy_pass https://127.0.0.1:8080;
        }

    }
2021 7 月30
采用最新Java驱动
<dependency>
            <groupId>org.mongodb</groupId>
            <artifactId>mongodb-driver-sync</artifactId>
            <version>4.3.0</version>
</dependency>
获取数据源及数据库
/**
 * @author wizzer@qq.com
 */
public class ZMongoDatabase {

    private MongoDatabase db;

    public ZMongoDatabase(MongoDatabase db) {
        this.db = db;
    }

    /**
     * 获取集合,集合不存在则返回 null
     *
     * @param name 集合名称
     * @return 集合薄封装
     */
    public MongoCollection<Document> getCollection(String name) {
        if (!this.collectionExists(name)) {
            return null;
        }
        return db.getCollection(name);
    }

    /**
     * 获取一个集合,如果集合不存在,就创建它
     *
     * @param name         集合名
     * @param dropIfExists true 如果存在就清除
     * @return 集合薄封装
     */
    public MongoCollection<Document> createCollection(String name, boolean dropIfExists) {
        // 不存在则创建
        if (!this.collectionExists(name)) {
            return createCollection(name, null);
        }
        // 固定清除
        else if (dropIfExists) {
            db.getCollection(name).drop();
            return createCollection(name, null);
        }
        // 已经存在
        return db.getCollection(name);
    }

    /**
     * 获取一个集合,如果集合不存在,就创建它
     *
     * @param name         集合名
     * @param options      集合配置信息
     * @param dropIfExists true 如果存在就清除
     * @return 集合薄封装
     */
    public MongoCollection<Document> createCollection(String name, CreateCollectionOptions options, boolean dropIfExists) {
        // 不存在则创建
        if (!this.collectionExists(name)) {
            return createCollection(name, options);
        }
        // 固定清除
        else if (dropIfExists) {
            db.getCollection(name).drop();
            return createCollection(name, options);
        }
        // 已经存在
        return db.getCollection(name);
    }

    /**
     * 创建一个集合
     *
     * @param name    集合名
     * @param options 集合配置信息
     * @return 集合薄封装
     */
    public MongoCollection<Document> createCollection(String name, CreateCollectionOptions options) {
        if (this.collectionExists(name)) {
            throw Lang.makeThrow("Colection has exists: %s.%s", db.getName(), name);
        }
        // 创建默认配置信息
        if (null == options) {
            options = new CreateCollectionOptions().capped(false);
        }
        db.createCollection(name, options);
        return db.getCollection(name);
    }

    /**
     * 判断集合是否存在
     *
     * @param collectionName 集合名
     * @return
     */
    public boolean collectionExists(String collectionName) {
        return listCollectionNames().contains(collectionName);
    }

    /**
     * @return 当前数据库所有可用集合名称
     */
    public List<String> listCollectionNames() {
        return db.listCollectionNames().into(new ArrayList<String>());
    }

    public MongoDatabase getNativeDB() {
        return this.db;
    }
}
初始化数据库示例
@Inject
    private ZMongoDatabase zMongoDatabase;

    public void init() {
        CreateCollectionOptions collectionOptions = new CreateCollectionOptions();
        TimeSeriesOptions timeSeriesOptions = new TimeSeriesOptions("ts");
        timeSeriesOptions.metaField("metadata");
        timeSeriesOptions.granularity(TimeSeriesGranularity.SECONDS);
        collectionOptions.timeSeriesOptions(timeSeriesOptions);
        MongoCollection<Document> deviceCollection = zMongoDatabase.createCollection("device", collectionOptions, true);
        List<Document> list = new ArrayList<>();
        Device device = new Device(Times.now(), 36.7, "0001");
        list.add(new Document().append("ts", device.getTs()).append("temperature", device.getTemperature()).append("metadata",
                new Document().append("no", device.getNo())));

        Device device1 = new Device(Times.now(), 35.2, "0002");
        list.add(new Document().append("ts", device1.getTs()).append("temperature", device1.getTemperature()).append("metadata",
                new Document().append("no", device1.getNo())));

        Device device2 = new Device(Times.now(), 10.7, "0002");
        list.add(new Document().append("ts", device2.getTs()).append("temperature", device2.getTemperature()).append("metadata",
                new Document().append("no", device2.getNo())));

        Device device3 = new Device(Times.nextDay(Times.now(), 1), 30.0, "0002");
        list.add(new Document().append("ts", device3.getTs()).append("temperature", device3.getTemperature()).append("metadata",
                new Document().append("no", device3.getNo())));

        // Document.parse(Json.toJson(new Device()));

        InsertManyResult insertManyResult = deviceCollection.insertMany(list);
        log.info(Json.toJson(insertManyResult));
    }
时序数据求平均值示例
    // 官方时序数据统计Demo https://docs.mongodb.com/manual/core/timeseries-collections/
    @Ok("json:full")
    @At("/avg")
    public Object avg(@Param(value = "no", df = "0002") String no) {
        List<Bson> bsons = new ArrayList<>();
        // 筛选条件
        Bson match = Aggregates.match(Filters.eq("metadata.no", no));

        // 输出对象
        Bson project = Aggregates.project(Projections.fields(
                // 日期格式化
                Projections.computed("date", new Document("$dateToParts", new Document().append("date", "$ts"))),
                Projections.computed("temperature", 1)
        ));

        // 分组统计 平均值
        Bson group = Aggregates.group(new Document("date", new Document().append("year", "$date.year").append("month", "$date.month").append("day", "$date.day")),
                Accumulators.avg("avgTemp", "$temperature")
        );

        bsons.add(match);
        bsons.add(project);
        bsons.add(group);
        log.info(Json.toJson(bsons));
        return zMongoDatabase.getCollection("device").aggregate(bsons);
    }
完整代码:
nutzboot starter 组件
nutzboot-starter-mongodb-plus
组件使用示例
nutzboot-demo-simple-mongodb-plus
i’am a separator…
2021 5 月12
1、el-tabs 中放置 el-tree 使用 this.$ref[‘tree’] 获取不到对象
使用 this.$ref[‘tree’][0] 可以取到
2、el-cascader 动态加载行政区划,修改表单时无法初始化选中的值
需要设置属性 :key=”xx” ,在数据加载完成后让 xx ++ 自加1
2021 3 月25
nutz 及 nutzboot 已支持 TDengine
基于 nutzboot 开发 TDengine 实例
开发环境
服务端:CentOS 8.2 64 位
客户端:Windows 10 64 位 TDengine 安装及配置
官网下载 rpm 安装包
执行安装 rpm -ivh TDengine-server-2.0.18.0-Linux-x64.rpm
修改配置文件 vi /etc/taos/taos.cfg 加上当前服务器 hostname 主机名 # first fully qualified domain name (FQDN) for TDengine system
firstEp wizzer-test:6030
# local fully qualified domain name (FQDN)
fqdn wizzer-test
若为默认密码则直接输入 taos 或 taos -h 127.0.0.1 执行数据库创建命令 taos > create database test;
Windows 10 hosts 配置
修改 C:\Windows\System32\drivers\etc\hosts
添加 ip wizzer-test 创建 nutzboot Maven 项目
pom.xml 文件加入 nutzboot 及 TDengine JDBC 依赖 <?xml version="1.0" encoding="UTF-8"?>
<project xmlns="http://maven.apache.org/POM/4.0.0"
xmlns:xsi="http://www.w3.org/2001/XMLSchema-instance"
xsi:schemaLocation="http://maven.apache.org/POM/4.0.0 http://maven.apache.org/xsd/maven-4.0.0.xsd">
<modelVersion>4.0.0</modelVersion>
<groupId>com.budwk</groupId>
<artifactId>test</artifactId>
<version>1.0-SNAPSHOT</version>
<properties>
<nutzboot.version>2.4.2-SNAPSHOT</nutzboot.version>
<jaxb-api.version>2.3.1</jaxb-api.version>
<slf4j.version>1.7.25</slf4j.version>
<logback.version>1.2.3</logback.version>
<taos-jdbcdriver.version>2.0.23</taos-jdbcdriver.version>
<maven.compiler.source>8</maven.compiler.source>
<maven.compiler.target>8</maven.compiler.target>
</properties>
<dependencies>
<dependency>
<groupId>org.nutz</groupId>
<artifactId>nutzboot-core</artifactId>
</dependency>
<dependency>
<groupId>org.nutz</groupId>
<artifactId>nutzboot-starter-nutz-dao</artifactId>
</dependency>
<dependency>
<groupId>org.nutz</groupId>
<artifactId>nutzboot-starter-jdbc</artifactId>
</dependency>
<dependency>
<groupId>com.taosdata.jdbc</groupId>
<artifactId>taos-jdbcdriver</artifactId>
<version>${taos-jdbcdriver.version}</version>
</dependency>
<dependency>
<groupId>org.slf4j</groupId>
<artifactId>slf4j-api</artifactId>
<version>${slf4j.version}</version>
</dependency>
<dependency>
<groupId>ch.qos.logback</groupId>
<artifactId>logback-core</artifactId>
<version>${logback.version}</version>
</dependency>
<dependency>
<groupId>ch.qos.logback</groupId>
<artifactId>logback-classic</artifactId>
<version>${logback.version}</version>
</dependency>
</dependencies>
<dependencyManagement>
<dependencies>
<dependency>
<groupId>org.nutz</groupId>
<artifactId>nutzboot-parent</artifactId>
<version>${nutzboot.version}</version>
<type>pom</type>
<scope>import</scope>
</dependency>
</dependencies>
</dependencyManagement>
<repositories>
<repository>
<id>nutz</id>
<url>http://jfrog.nutz.cn/artifactory/libs-release</url>
</repository>
<repository>
<id>nutz-snapshots</id>
<url>http://jfrog.nutz.cn/artifactory/snapshots</url>
<snapshots>
<enabled>true</enabled>
<updatePolicy>always</updatePolicy>
</snapshots>
<releases>
<enabled>false</enabled>
</releases>
</repository>
</repositories>
<pluginRepositories>
<pluginRepository>
<id>nutz-snapshots</id>
<url>http://jfrog.nutz.cn/artifactory/snapshots</url>
<snapshots>
<enabled>true</enabled>
<updatePolicy>always</updatePolicy>
</snapshots>
<releases>
<enabled>false</enabled>
</releases>
</pluginRepository>
</pluginRepositories>
<build>
<plugins>
<plugin>
<groupId>org.apache.maven.plugins</groupId>
<artifactId>maven-compiler-plugin</artifactId>
<version>3.7.0</version>
<configuration>
<source>1.8</source>
<target>1.8</target>
<compilerArgs>
<arg>-parameters</arg>
</compilerArgs>
<useIncrementalCompilation>false</useIncrementalCompilation>
</configuration>
</plugin>
<plugin>
<groupId>org.nutz.boot</groupId>
<artifactId>nutzboot-maven-plugin</artifactId>
<version>${nutzboot.version}</version>
</plugin>
</plugins>
</build>
</project>
/**
 * 注意 TDengine 表及字段名都为小写字母
 */
@Table("iot_dev")
public class Iot_dev implements Serializable {
    private static final long serialVersionUID = 1L;

    @Column
    @Comment("ID")
    @ColDefine(type = ColType.TIMESTAMP)
    private Date ts;

    @Column("devid") //字段名都为小写字母
    @Comment("设备 ID")
    @ColDefine(type = ColType.VARCHAR, width = 32)
    private String devId;

    @Column("devtype") //字段名都为小写字母
    @Comment("设备类型")
    @ColDefine(type = ColType.BINARY, width = 32)
    private String devType;

    @Column
    @Comment("状态")
    @ColDefine(type = ColType.BOOLEAN)
    private Boolean status;

    @Column
    @Comment("读数 1")
    @ColDefine(type = ColType.DOUBLE)
    private Double val1;

    @Column
    @Comment("读数 2")
    @ColDefine(type = ColType.INT)
    private Integer val2;

    @Column
    @Comment("读数 3")
    @ColDefine(type = ColType.INT,width = 3)
    private Integer val3;

    @Column
    @Comment("读数 4")
    @ColDefine(type = ColType.INT,width = 2)
    private Integer val4;

}
完整代码见
https://gitee.com/wizzer/demo/tree/master/nutzboot-tdengine-demo
2021 3 月24
本插件不同于V5代码生成器插件,无须引入项目中其他jar包,无须事先编译POJO类:
插件不依赖任何第三方jar包
通过 POJO 类生成接口类、接口实现类、控制类
IDEA 须从项目根目录打开加载项目(以获取正确的 projectBasePath )
打开 POJO 类Java文件,在文件内部右击选择”Generate”->”WkCodeGenerator” 插件下载:https://gitee.com/budwk/budwk-codegenerator/releases
插件源码:
https://gitee.com/budwk/budwk-codegenerator
https://github.com/budwk/budwk-codegenerator
2021 3 月12
1、终端设置代理
export http_proxy=socks5://127.0.0.1:1080
export https_proxy=socks5://127.0.0.1:1080
2、安装Homebrew
/bin/bash -c "$(curl -fsSL https://raw.githubusercontent.com/Homebrew/install/HEAD/install.sh)"3、Spotlight 索引占有CPU过高
关闭
sudo mdutil -a -i off打开
sudo mdutil -a -i on
2021 1 月13
之前,长期是 ThinkPad 忠实用户,从 X230 、X1 2016直到X1 2019。
X1 2019 太让人失望了(挂闲鱼卖了),首先配置是 i7 10710u + 16G + 1T + 4K,CPU 6核12线程,单核起步频率1.1GHz最高4.7GHz。表现起来还没 X1 2016款来的快,因为它动态调整频率,睿频上下波动。
撸码编译时风扇爆转,吹出的热气烫手,而且风扇口设计不合理,刚好对着鼠标位置的手面吹。夜里稍微多开个任务,那风扇的噪音能把娃吵醒,电池撑死能用两小时,最后20%电量掉电非常快。4K屏幕就是个鸡肋,GPU比较弱,占用资源不说玩LOL掉帧厉害,平时也没啥用途。
用 X1 2019 最悲惨得一次是,死机后SSD硬盘居然坏了,售后免费更换新的,但十几年的数据都丢了(好在部分重要资料有备份),害得我不得不上了群晖 NAS 以保万无一失。自从用 X1 2019, 蓝屏 2 次,死机N次,用得太心累了,提心吊胆的,刚巧看到M1性能评测那么高,下定决心换之。
自从换了 M1,那感受完全不一样,首先性能爆表,编译或玩游戏,CPU占用在10-20%之间,很少超过20%,偶尔一次50%。CPU占用不光低,关键风扇还不转,都不用动一下去散热的!底部外壳冰冷冰冷的,看来也只能通过处理4K视频压CPU来暖手了?
Mac系统上的优势就更不用说了,首先不用去磁盘分区,不用考虑C盘分多少,够不够用啊,D盘分多少?不用关机,X1 2019 Windows 10要等半天电脑才能关掉,有时候很关不掉要强制关机,Mac合上盖子拎起就走。有一次X1睡眠放包里,回到家包里温度很烫都快炸了都感觉,打开一看电量所剩无几,而Mac完全不会。
说到电池,M1的电池非常给力,看两小时视频+浏览一小时网页,玩了一个晚上还剩余82%的电量,以后下班不用带电源线回家了。
软件方面,目前M1用于Java开发足够了,相信后面原生支持M1的应用会越来越多,那时候M1性能可以充分发挥出来。
2020 12 月23
 <el-cascader ref="area" v-model="infoForm.area" :props="cascaderProps" style="width: 500px;"
                                     size="small" placeholder="请选择区域"></el-cascader>
cascaderProps: {
                    lazy: true,
                    value: 'id',
                    label: 'text',
                    lazyLoad: function (node, resolve) {
                        if (node.level === 0) {
                            var url = base + "/assets/platform/plugins/zoning/0.json";
                            $.get(url, function (d) {
                                resolve(d);
                            }, "json");
                        } else {
                            var pidaspath = node.data.id > 0 ? (node.data.id.substring(0, 2) + "/" + node.data.id) : 0;
                            var url = base + "/assets/platform/plugins/zoning/"+pidaspath+".json";
                            $.get(url, function (d) {
                                resolve(d);
                            }, "json");
                        }
                    }
                },
                infoForm: {
                    type: 'designer',
                    area: [],
                    areaCode: '',
                    areaText: '',
                },
// 后台返回数据时
this.$set(this.infoForm,'area',this.infoForm.areaCode.split(','))
// 前端入库数据处理
if (this.infoForm.area) {
this.$set(this.infoForm, 'areaCode', this.infoForm.area.toString());
}
if (this.$refs['area']) {
var tree = this.$refs['area'].getCheckedNodes();
this.$set(this.infoForm, 'areaText', tree[0].pathLabels.toString());
}
2020 12 月22
File[] files=Files.lsDir(new File("D://node/zoning/dist/zoning-3"),"");
        for(File dir:files){
            if(Files.isDirectory(dir)){
                File[] files2=Files.lsAll(dir.getAbsoluteFile(),"json");
                for(File file:files2){
                    System.out.println(file.getAbsolutePath());
                    System.out.println(file.getName());
                    if(file.getName().length()==9||file.getName().equalsIgnoreCase("81.json")||file.getName().equalsIgnoreCase("82.json")){
                        String str=Files.read(file);
                        List<NutMap> list=Json.fromJsonAsList(NutMap.class,str);
                        List<NutMap> list2=new ArrayList<>();
                        for(NutMap nutMap:list){
                            nutMap.addv("leaf",true);
                            list2.add(nutMap);
                        }
                        Files.write(file,Json.toJson(list2, JsonFormat.compact()));
                    }
                }
            }
        }
PS:临时用,不要纠结命名~~
2020 12 月16
pom.xml
<dependency>
    <groupId>com.github.whvcse</groupId>
    <artifactId>easy-captcha</artifactId>
    <version>1.6.2</version>
</dependency>
生成验证码:
public NutMap getCode() {
        String uuid = UUID.randomUUID().toString().replace("-", "");
        ArithmeticCaptcha captcha = new ArithmeticCaptcha(120, 40);
        captcha.getArithmeticString();  // 获取运算的公式:3+2=?
        String text = captcha.text();
        redisService.setex(RedisConstant.REDIS_CAPTCHA_KEY + uuid, 180, text);
        return NutMap.NEW().addv("key", uuid).addv("codeUrl", captcha.toBase64());
    }
验证验证码:(表单传递验证码及验证码key)
public void checkCode(String key, String code) throws CaptchaException {
        String codeFromRedis = redisService.get(RedisConstant.REDIS_CAPTCHA_KEY + key);

        if (Strings.isBlank(code)) {
            throw new CaptchaException("请输入验证码");
        }
        if (Strings.isEmpty(codeFromRedis)) {
            throw new CaptchaException("验证码已过期");
        }
        if (!Strings.equalsIgnoreCase(code, codeFromRedis)) {
            throw new CaptchaException("验证码不正确");
        }
        redisService.del(RedisConstant.REDIS_SMSCODE_KEY + key);
    }

try {
      validateService.checkCode(key, code);
} catch (CaptchaException e) {
      return Result.error(e.getMessage());
}
异常类:
public class CaptchaException extends Exception{
    public CaptchaException(String message) {
        super(message);
    }
}
2020 12 月2
package com.budwk.app.base.utils;

import org.nutz.lang.util.NutMap;

import java.nio.file.Files;
import java.nio.file.Path;
import java.nio.file.Paths;
import java.util.ArrayList;
import java.util.Comparator;
import java.util.List;
import java.util.stream.Stream;

/**
 * @author wizzer@qq.com
 */
public class FileUtil {

    /**
     * 分页获取文件列表
     *
     * @param basePath   目录
     * @param pageNumber 页码
     * @param pageSize   页大小
     * @param sort       按文件名排序
     * @return 列表
     * @throws Exception
     */
    public static NutMap readListPage(String basePath, Integer pageNumber, Integer pageSize, String sort)
            throws Exception {
        int offset = (pageNumber - 1) * pageSize;
        int limit = pageNumber * pageSize;
        long total = 0;
        List<NutMap> list = new ArrayList<>();
        Comparator<Path> comparator = Comparator.naturalOrder();
        if ("desc".equals(sort)) {
            comparator = Comparator.reverseOrder();
        }
        try (Stream<Path> fileList = Files.list(Paths.get(basePath))) {
            total = fileList.count();
        }
        try (Stream<Path> fileList = Files.list(Paths.get(basePath)).sorted(comparator).skip(offset)
                .limit(limit)) {
            fileList.forEach(file -> {
                NutMap nutMap = NutMap.NEW();
                String fileName = file.getFileName().toString();
                nutMap.addv("fileName", fileName);
                if (Files.isDirectory(file.toAbsolutePath())) {
                    nutMap.addv("folder", true);
                    nutMap.addv("suffix", "folder");
                } else {
                    String suffix = fileName.substring(fileName.indexOf(".") + 1).toLowerCase();
                    nutMap.addv("folder", false);
                    nutMap.addv("suffix", suffix);
                }
                list.add(nutMap);
            });
            return NutMap.NEW().addv("total", total).addv("list", list);
        }
    }
}