201310 月29
电信光纤猫 中兴F660 超级密码破解方法
cmd
telnet 192.168.1.1
root
root
sendcmd 1 DB p UserInfo
看telecomadmin后面8位数,就是超级密码
cmd telnet 192.168.1.1 root root
sendcmd 1 DB p UserInfo
看telecomadmin后面8位数,就是超级密码
在网站根目录下的子目录uc_server/data中打开找到文件config.inc.php 以及 config/config_global.php、config/config_ucenter.php (这两个如果没有下面代码可以不用修改) 找到类似以下代码: define(‘UC_FOUNDERPW’, ’256955f2e034sad74f0e2953572ea360′); define(‘UC_FOUNDERSALT’, ’217804′);
然后用以下代码替换 define(‘UC_FOUNDERPW’, ’047099adb883dc19616dae0ef2adc5b6′); define(‘UC_FOUNDERSALT’, ’311254′);
修改完后,Ucenter创始人的密码就变为: 123456789
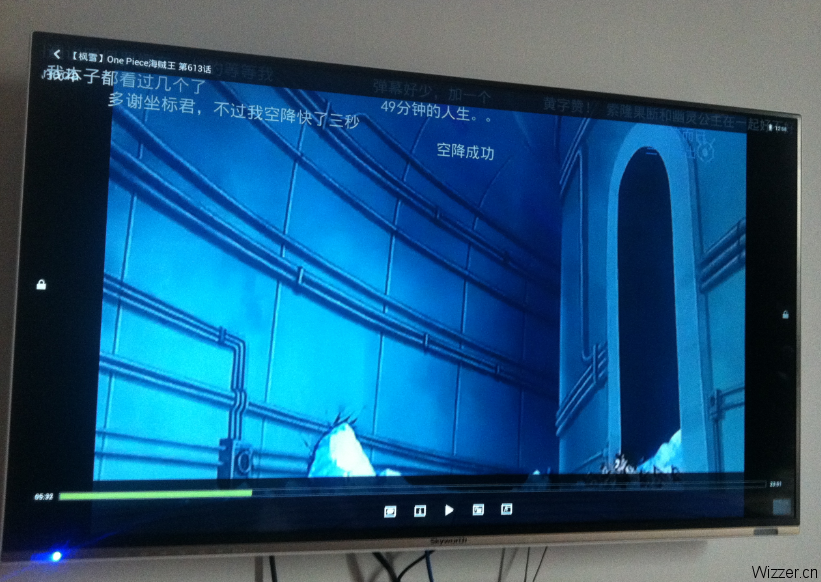
楼主电视型号:创维39E780U 4K电视
软件下载地址:
经过验证,优酷TV客户端、Bilibili 弹幕网客户端 最稳定,但后者列表字体过小。 MoreTV、小鹰直播、泰捷电视,大部分情况下可用,但如果视频打不开容易把电视搞死机。
百度云、迅雷云播,目前还不稳定,百度云不能播放,迅雷云很卡。


优酷TV客户端下载:
http://mobile.youku.com/index/wireless 优酷机顶盒客户端
使用教程:
1、将电视和路由器通过有线或者是无线连接到同一个路由器(路由的LAN 口IP建议使用默认如果不是默认请改为192.168.1.1 或192.168.0.1
2、电脑端运行安装工具  ,该工具可以在广东分公司服务部技术联盟群下载。
3、双击打开工具

4、查看电视端获取到网络的IP 在光标闪烁处输入IP(电视IP 查看在电视的网络设置)回车键确认

5、输入1 回车注意提示如果显示unable to 就表示没有连接上电视需要检查一下网络连接如果没有问题可以再重新连接一次

6、如果连接成功会出现下图所示connected to 输入1 回车键确认

7、如果连接正常程序会自动调出APK 安装器,点击设备管理,选中你的电视。

8、将下载好的APK 文件拖入APK 安装器如果安装到机身内存请去掉优先安装到SD 卡上。建议外接优盘或SD 卡安装到外挂存储。

9、安装过程中

10、安装完成就可以在电视我的应用里面出现刚才安装的应用程序也可以点击APK 安装器的立即运行电视端运行应用建议使用鼠标操作电视。左键确定右键退出。

11、建议电视安装一个安卓市场TV版,或者乐视TV 应用然后就可以在应用商场里面管理应用下载海量应用。
12、由于CPU 架构的不同和机器配置的差异。和应用的繁杂不保证所有程序都可以在电视上运行,ARM 架构的CPU 兼容的程序较多,同时安装的应用大多都是针对手机开发的。是否可以正常运行需要实践安装检验。
package web.common.util;

import com.sun.image.codec.jpeg.JPEGCodec;
import com.sun.image.codec.jpeg.JPEGImageEncoder;

import java.io.IOException;
import java.awt.image.BufferedImage;
import java.awt.*;
import java.util.Random;

import javax.servlet.ServletException;
import javax.servlet.ServletOutputStream;
import javax.servlet.http.HttpServlet;
import javax.servlet.http.HttpServletRequest;
import javax.servlet.http.HttpServletResponse;
import javax.servlet.http.HttpSession;

/**
 * @author Wizzer.cn
 * @time   2012-9-13 上午10:54:04
 *
 */
public class ImageUtil extends HttpServlet {

    private static final long serialVersionUID = 1L;
    private static final String CONTENT_TYPE = "image/jpeg;charset=GB2312";
    private static final String allcode[] = { "0", "1", "2", "3", "4", "5",
            "6", "7", "8", "9" };

    private static final Font mFont = new Font("Times New Roman", Font.BOLD, 18);// 设置字体

    public static Font IFont = new Font("宋体", Font.PLAIN, 18);// 设置字体

    public static int x = 10; // 坐标
    public static int y = 10;

    public void init() throws ServletException {
    }

    public void doGet(HttpServletRequest request, HttpServletResponse response)
            throws ServletException, IOException {
        doPost(request, response);
    }

    public void doPost(HttpServletRequest request, HttpServletResponse response)
            throws ServletException, IOException {

        response.setContentType(CONTENT_TYPE);
        ServletOutputStream out = response.getOutputStream();
        getImage(out, request, response);
        out.close();
    }

    private void getImage(ServletOutputStream out, HttpServletRequest request,
            HttpServletResponse response) {
        try {

            HttpSession session = request.getSession(true);

            response.setContentType("image/gif");
            response.setHeader("Pragma", "No-cache");
            response.setHeader("Cache-Control", "no-cache");
            response.setDateHeader("Expires", 0);
            int width = 60, height = 20;

            BufferedImage image = new BufferedImage(width, height,
                    BufferedImage.TYPE_INT_RGB); // 设置图片大小的
            Graphics gra = image.getGraphics();
            Random random = new Random();

            gra.setColor(getRandColor(200, 250)); // 设置背景色
            gra.fillRect(0, 0, width, height);

            gra.setColor(Color.black); // 设置字体色
            gra.setFont(mFont);

            // 随机产生155条干扰线,使图象中的认证码不易被其它程序探测到

            for (int i = 0; i < 100; i++) {
                gra.setColor(getRandColor(120, 220));
                x = random.nextInt(width);
                y = random.nextInt(height);
                int xl = random.nextInt(12);
                int yl = random.nextInt(12);
                gra.drawLine(x, y, x + xl, y + yl);
            }

            // 取随机产生的认证码(4位)
            String sRand = "";
            for (int i = 0; i  255)
            fc = 255;
        if (bc > 255)
            bc = 255;
        int r = fc + random.nextInt(bc - fc);
        int g = fc + random.nextInt(bc - fc);
        int b = fc + random.nextInt(bc - fc);
        return new Color(r, g, b);
    }

    public static Font getIFont() {
        return IFont;
    }

    public static void setIFont(Font IFont) {
        ImageUtil.IFont = IFont;
    }

    public static int getY() {
        return y;
    }

    public static void setY(int y) {
        ImageUtil.y = y;
    }

    public static int getX() {
        return x;
    }

    public static void setX(int x) {
        ImageUtil.x = x;
    }

}
若提示找不到包:
import com.sun.image.codec.jpeg.JPEGCodec; import com.sun.image.codec.jpeg.JPEGImageEncoder;
则做如下修改即可:
Eclipse 默认把这些受访问限制的API设成了ERROR。
只要把 Deprecated and restricted API中的Forbidden references(access rules) 选为Warning 就可以编译通过。

作者:wtmdbf

 从从上可以看出,notepad的下划线是在产生新的行以后才绘制出来的,为了读者阅读的方便,我把notepad的源码贴出来如下:
public static class LinedEditText extends EditText {
        private Rect mRect;
        private Paint mPaint;

        // This constructor is used by LayoutInflater
        public LinedEditText(Context context, AttributeSet attrs) {
            super(context, attrs);

            // Creates a Rect and a Paint object, and sets the style and color of the Paint object.
            mRect = new Rect();
            mPaint = new Paint();
            mPaint.setStyle(Paint.Style.STROKE);
            mPaint.setColor(0x800000FF);
        }

        /**
         * This is called to draw the LinedEditText object
         * @param canvas The canvas on which the background is drawn.
         */
        @Override
        protected void onDraw(Canvas canvas) {

            // Gets the number of lines of text in the View.
            int count = getLineCount();

            // Gets the global Rect and Paint objects
            Rect r = mRect;
            Paint paint = mPaint;

            /*
             * Draws one line in the rectangle for every line of text in the EditText
             */
            for (int i = 0; i < count; i++) {

                // Gets the baseline coordinates for the current line of text
                int baseline = getLineBounds(i, r);

                /*
                 * Draws a line in the background from the left of the rectangle to the right,
                 * at a vertical position one dip below the baseline, using the "paint" object
                 * for details.
                 */
                canvas.drawLine(r.left, baseline + 1, r.right, baseline + 1, paint);
            }

            // Finishes up by calling the parent method
            super.onDraw(canvas);
        }
    }
那是如何实现我所说的一开始就绘制好下划线的效果呢,在此之前,你需要了解如何在android中获得字体的高度,网上有很多,为了方便大家阅读特摘录如下,先看图:
 然后我们可以通过下面的代码获得字体大高度
Paint p = new Paint();
p.setTextSize(50);
p.setAntiAlias(true);
FontMetrics fm = p.getFontMetrics();
int textHeight = (int) (Math.ceil(fm.descent - fm.ascent) + 2);
读者了解了上面的知识点以后就可以,在看我是如何实现的。 基本思想是根据字体的高度,在view的对应位置上绘制好每条line,代码如下:
package com.example.customedittext;

import android.content.Context;
import android.graphics.Canvas;
import android.graphics.Color;
import android.graphics.Paint;
import android.graphics.Paint.FontMetrics;
import android.util.AttributeSet;
import android.view.Gravity;
import android.widget.EditText;

public class CustomEditText extends EditText {

    private Paint mPaint;
    private int lines = 0;
    private float fontHeight = 0;
    private float leading = 0;

    public CustomEditText(Context context, AttributeSet attrs, int defStyle) {
        super(context, attrs, defStyle);
        initPaint();
    }

    public CustomEditText(Context context, AttributeSet attrs) {
        super(context, attrs);
        initPaint();
    }

    public CustomEditText(Context context) {
        super(context);
        initPaint();
    }

    private void initPaint() {
        mPaint = new Paint();
        mPaint.setStyle(Paint.Style.STROKE);
        mPaint.setColor(Color.parseColor("#CDDCD5"));
        mPaint.setAntiAlias(true);
    }

    @Override
    public void onWindowFocusChanged(boolean hasWindowFocus) {
        super.onWindowFocusChanged(hasWindowFocus);
        int lineHeight = getLineHeight();
        int viewHeight = getHeight();
        lines = viewHeight / lineHeight;
        setGravity(Gravity.TOP);
        float textSize = getTextSize();
        Paint paint = new Paint();
        paint.setTextSize(textSize);
        FontMetrics fontMetrics = paint.getFontMetrics();
        fontHeight = fontMetrics.descent - fontMetrics.ascent;
        leading = fontMetrics.leading;// leading == 0
        setBackgroundColor(Color.parseColor("#F8F6DF"));
    }

    @Override
    public void onDraw(Canvas canvas) {
        super.onDraw(canvas);
        int count = getLineCount();
        if (count <= lines) {
            for (int i = 1; i < lines; i++) {

                canvas.drawLine(0, fontHeight * i + leading * i, getWidth(),
                        fontHeight * i + leading * i, mPaint);
            }
        } else {
            for (int i = 1; i < count; i++) {
                canvas.drawLine(0, fontHeight * i + leading * i, getWidth(),
                        fontHeight * i + leading * i, mPaint);
            }
        }
    }

}